Author: The Renter Upgrade Editorial Team

  • No-Drill Curtains for Renters: Mounts and Blackout Panel Options

    A no-drill curtain mount is useful only if it fits your rental. Our first shortlist has two options for different situations: brackets that attach to existing vertical blinds, and a floor-to-ceiling tension system. Choose the mounting method before buying fabric; neither is a universal replacement for securely installed wall brackets.

    Research checked October 9, 2026. These are researched recommendations, not products we have personally installed or durability-tested. We checked manufacturer requirements and accessible positive and critical owner reviews. Ratings describe the linked listings, may change, and may combine variants or syndicated reviews. Product links are ordinary links; affiliate enrollment is pending.

    The two choices at a glance

    OptionSuitable situationMain limitation
    NoNo Outside Mount, white — Walmart item 413169660Existing compatible vertical-blind headrailAdded weight depends on the rail’s secure installation
    Umbra Anywhere, white — Target TCIN 91490699Space for floor-to-ceiling tension polesCeiling height, floor contact and stability must suit the system

    NoNo Outside Mount: our conditional pick over compatible vertical blinds
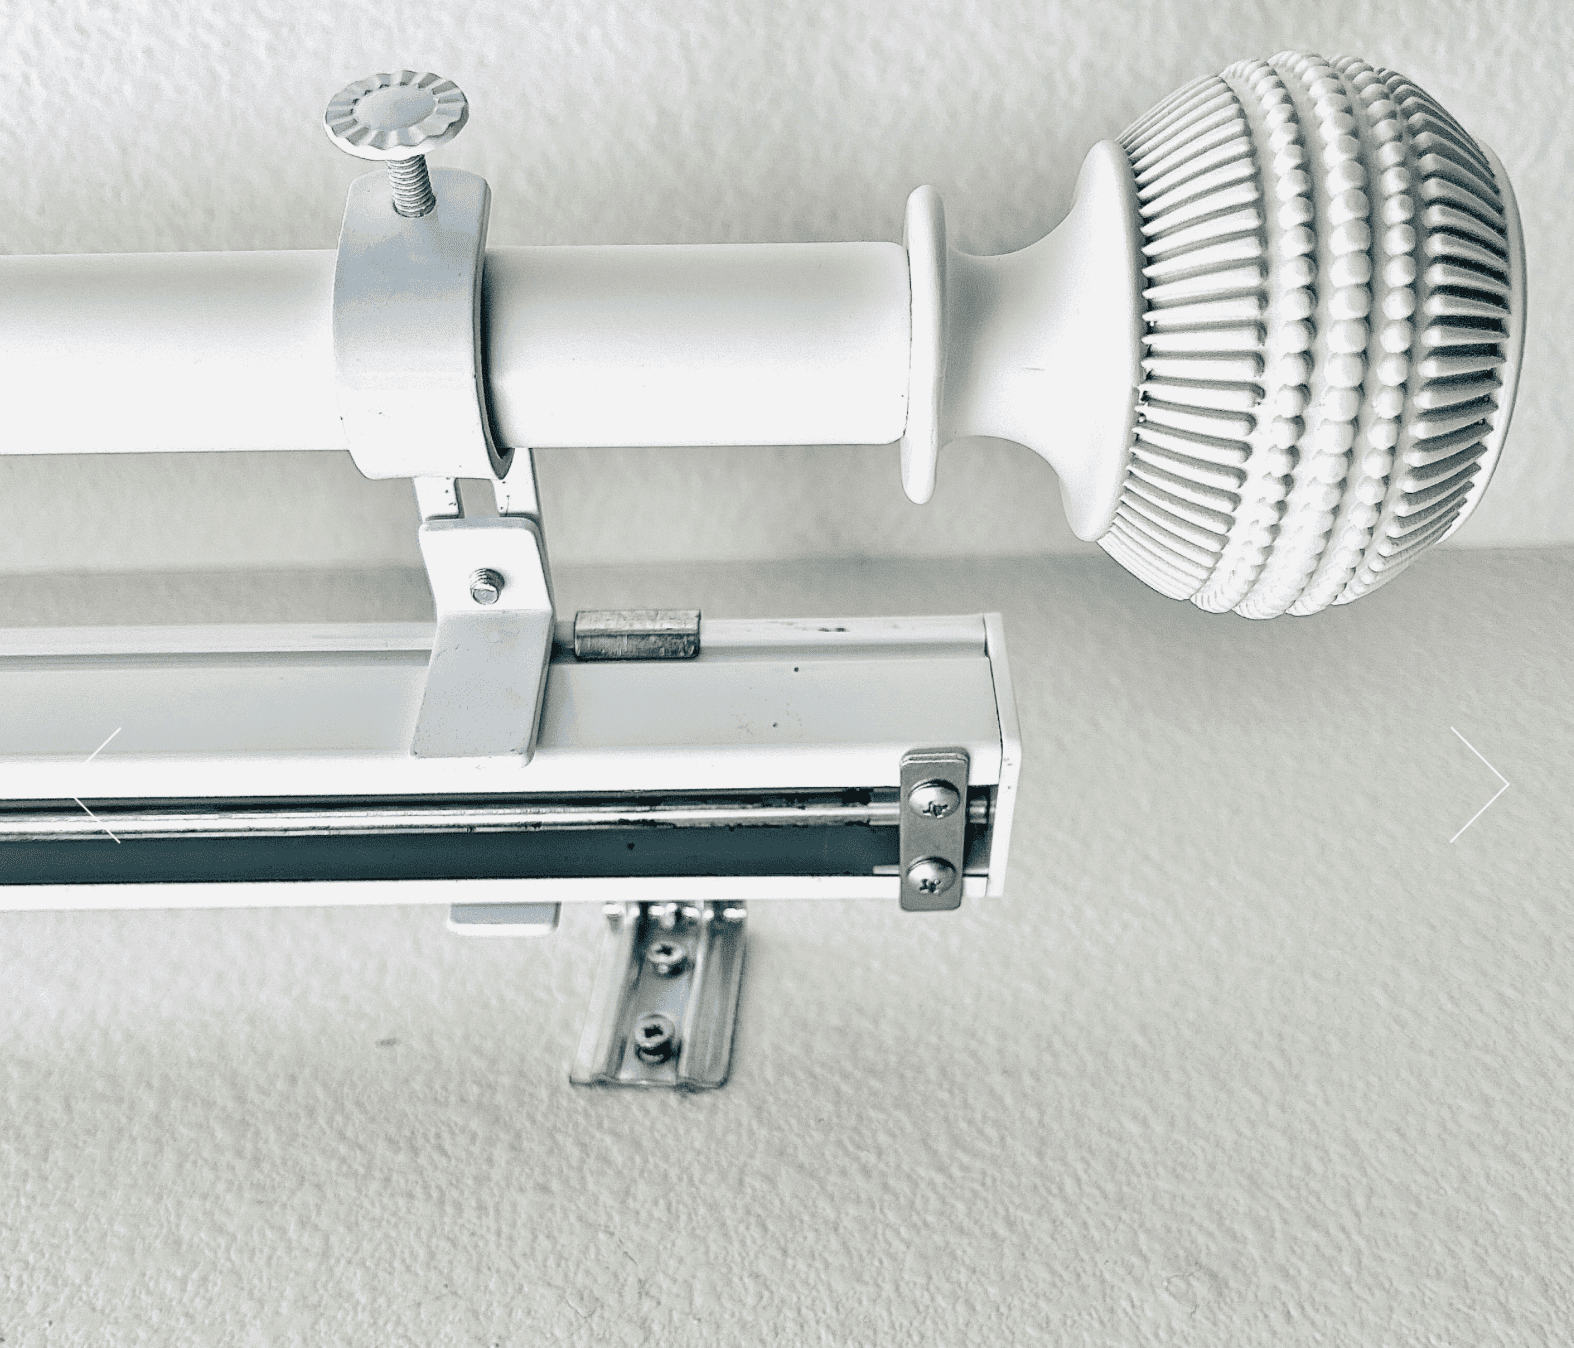
    NoNo Outside Mount curtain brackets white
    Photo: walmart.com

    The white outside-mount listing shows 4.6/5 from 59 ratings and offers ordering, sold by The NoNo Bracket Company. Owners describe successful installations; a critical review reports an oversized fit. Some reviews are incentivized. We have not pooled ratings from the inside-mount or three-bracket listings.

    The manufacturer specifies outside-mounted vertical blinds, a 1.5–2-inch adjustment range and a 1-inch curtain rod. Rod and curtains are separate purchases. Match your rail to the buying-guide pictures rather than choosing by color or the words “no drill.”

    The manufacturer’s FAQ gives no universal numerical load rating: support depends primarily on the existing rail’s attachment. Never install on a loose, damaged or improperly mounted rail. Measure the rail itself, not its decorative valance. Use two brackets up to 60 inches wide and three above that or for sliding glass doors. Grommet or tab-top curtains are recommended; rod-pocket curtains may not conceal the rail adequately.

    Our buying judgment: consider this only after confirming both compatibility and that the rail can carry the added rod and curtains. If the attachment is uncertain or the intended fabric is heavy, ask the landlord or manufacturer to assess the setup first. A high customer rating cannot establish the capacity of your particular installation.

    Umbra Anywhere: our conditional pick where tension poles fit

    Umbra Anywhere curtain rod white
    Photo: target.com

    The white Target listing, TCIN 91490699, shows 4.63/5 from 172 ratings and is listed in stock. Accessible reviews include praise for setup and stability, plus an owner reporting awkward screw fit and instability in a draft. These reviews include entries syndicated from Umbra; they are not a separate body of independent testing.

    Umbra’s specifications give a 7–10-foot height range, 36–66-inch width and 15-pound maximum. Curtains are not included. The retailer specifies low-traffic use on smooth, level surfaces, and Umbra’s answer on that listing excludes slanted ceilings.

    Our buying judgment: this is worth considering when there is room for both upright poles and a suitable floor and ceiling. Before ordering, mark out the pole positions and check normal door, window and curtain movement. Do not rely on extra pressure to rescue an unstable installation. Stop using it if poles shift, fittings loosen or the surfaces become marked.

    Manufacturer and retailer warranty descriptions differ. Check the terms for the exact seller and variant before purchase; we are not promising a particular warranty duration. Likewise, “no drill” describes the mounting method, not a guarantee that pressure will leave every painted surface untouched.

    Blackout panels to buy separately

    The two mounts above do not include fabric panels. These are two additional curtain options to consider, rather than pre-tested mount-and-curtain bundles. We have not measured their light blocking or tested either combination in a rental.

    IKEA MAJGULL: our first fabric option
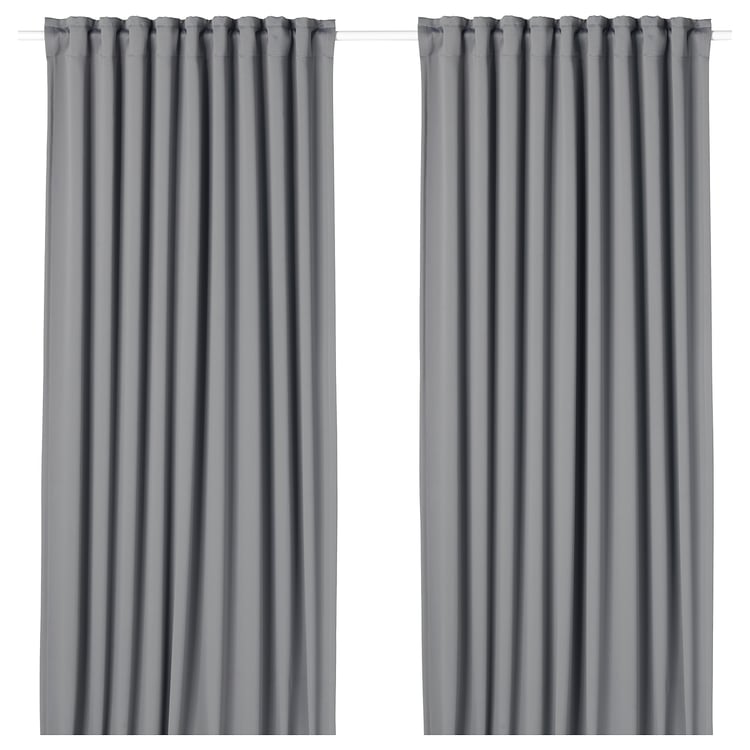
    IKEA MAJGULL blackout curtain pair gray 105.910.02
    Photo: ikea.com

    The gray blackout pair, article 105.910.02, is listed at 57 × 84 inches with heading tape, rod pockets and tabs. IKEA shows 4.6/5 from 884 reviews, including other colors, sizes and countries. Owners praise its light blocking and feel; critical feedback reports incomplete blackout, wrinkles and difficulty sliding the rear loops. The reviews do not establish how often these issues occur.

    IKEA lists product weight as 3 lb 12 oz and packaged weight as 3 lb 14 oz. Keep those figures distinct and confirm the unpacked hanging weight for the full pair before matching it to a mount. The care instructions allow up to 4% shrinkage, so wash before final hemming. Check that the variant actually says blackout: other MAJGULL colors are sold as room darkening. Local availability needs checking.

    Threshold blackout velvet two-pack: an alternative with inspection cautions

    Threshold blackout velvet curtain two-pack black 50 by 63 inches
    Photo: target.com

    The black 50 × 63-inch two-pack, TCIN 89191307, offers back tabs and rod pockets. Target’s shared listing shows 4.61/5 from 234 ratings and ordering availability. Verified owners praise its fabric and darkening; critical reports include light transmission, loose threads, damaged arrivals, mismatched lengths and color differences. This is a conditional alternative, not our strongest recommendation for someone who requires complete darkness.

    Check both panels immediately, especially seams, hanging loops and matching lengths. The listing’s single-panel and shipping weights differ substantially; do not use shipping weight as hanging weight or assume the lighter figure proves a compatible load. Confirm actual weight and dimensions for the selected pack before purchase. Reviews and Q&A span variants; the selected size and label take priority.

    Match panels to the mount

    For NoNo, the existing blind rail still determines whether the full hanging assembly can be supported. Use an appropriate tab arrangement only after confirming rod fit and coverage; a curtain’s pocket is not a reason to ignore the bracket instructions. For Umbra, keep the full supported load within its stated capacity and verify stability after installation. Neither panel’s high rating verifies the strength of your mounting surfaces.

    Blackout fabric and a dark room are different outcomes. Light can enter around the sides, top and center even when fabric blocks light well. Allow enough coverage and overlap for your window, check the result during daylight, and inspect the fabric for visible light transmission. Choose a return policy that lets you assess the actual setup. We are not promising a measured blackout percentage, noise reduction or energy savings.

    What did not make the shortlist

    The Command black hooks and two Room Essentials rods we screened did not meet our quality bar for this first batch. Umbra Chroma remains unselected because exact-model availability and review matching are incomplete. Their omission is a selection decision, not proof that every unit is defective. The installation guidance in our how-to article is not an endorsement of a specific adhesive hook.

    Check the complete setup before buying

    • Photograph the existing fittings and record the usable space, including handles and opening windows.
    • Choose light filtering or blackout fabric for your needs, then check the weight of both panels and any accessories.
    • Confirm everything you must buy separately: brackets, rod, rings and panels are different components.
    • Check the exact pack quantity, dimensions, seller and return terms. Similar names can identify different products.
    • Keep access to windows, heaters and exits clear. Test normal curtain movement after following the installation instructions.

    For measuring, installation and removal steps, start with our no-drill curtain setup guide. For choosing privacy versus light control, see our rental window privacy guide. If neither mount fits your rental, reuse suitable existing hardware or request permission for an appropriate installation.

    Our recommendation standard: quality, value and renter fit come first, including options that earn us no commission. This comparison is based on research, not our own hands-on testing. How we review products.
  • Lighting for Renters: A Task Lamp or a Smart Plug?

    If a room needs better reading light, add a lamp in the right location. If you already like a lamp but want scheduled on/off control, a compatible smart plug may be the smaller change. A smart plug does not improve where the light falls, and a conventional task lamp does not provide app control by itself.

    Research note: We reviewed manufacturer specifications and accessible owner feedback on October 9, 2026. We have not personally tested these products. Ratings below come from manufacturer-hosted pages; reviews can include other variants or off-model comments, so the averages do not prove reliability. Links are ordinary product links and currently earn no commission. Check current stock, price, and seller terms.

    Compare the two approaches

    Exact optionProblem it addressesRating snapshotCheck before buying
    IKEA FORSÅ nickel-plated work lamp, 601.467.64Directed light for a desk or reading spot4.7/5; roughly 2,140 IKEA reviewsUS E12 bulb required and sold separately; inspect base
    Tapo P125M US mini smart plugOn/off scheduling for a suitable existing lampAbout 4.7/5; 31 reviews on the manufacturer’s 3-pack page2.4 GHz Wi-Fi and chosen ecosystem setup requirements

    For better task lighting: IKEA FORSÅ

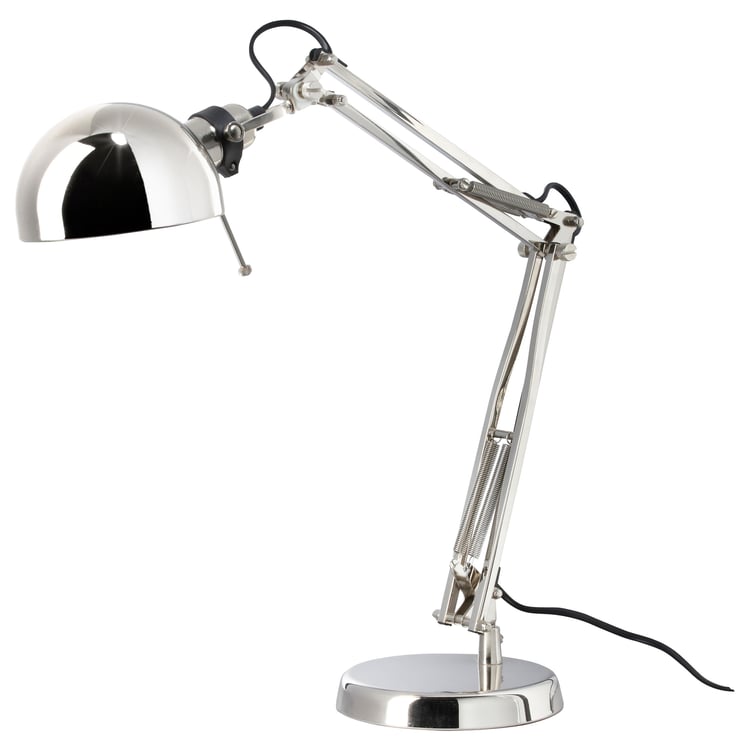
    IKEA FORSÅ work lamp nickel plated 601.467.64
    Photo: ikea.com

    The US nickel-plated FORSÅ has an adjustable arm and shade, a six-inch base, and a cord approximately 5 feet 11 inches long. IKEA specifies an E12 chandelier bulb, sold separately, and a maximum actual bulb wattage of 40 watts. Buy the US socket type rather than following bulb advice from another market.

    Visible owners praise directed light and the adjustable design. One critical owner reports a wobbly connection to the base; several others found the separate bulb requirement inconvenient. Inspect and assemble it before use, and resolve a loose base with the seller rather than accepting instability. We cannot calculate how often that problem occurs from the accessible reviews.

    Choose it when: the base fits your desk or side table and the adjustable shade puts light where you need it. Confirm local IKEA availability. This is a conventional plug-in task lamp; app control is not included.

    For scheduling an existing lamp: Tapo P125M

    The US P125M uses 2.4 GHz Wi-Fi, with Bluetooth for setup. It provides switching, scheduling, and Matter integration. Treat this selection as on/off lamp control, not a dimming upgrade. TP-Link lists maximum loads for different uses; check the exact instructions and your lamp’s actual electrical load.

    The manufacturer’s matching three-pack page includes praise for simple setup and responsive control. One owner describes initial Matter integration trouble that later resolved with software updates and setup guidance. A different comment mentions energy readings, which we do not treat as proof of a P125M feature. These are manufacturer-hosted reports, not independent long-term tests.

    Choose it when: your existing lamp resumes lighting after power is restored, and you can meet the network and controller requirements for your chosen setup. Review TP-Link’s Matter setup guidance; using a compatible ecosystem can require additional controller hardware even though basic Tapo-app use does not need a dedicated Tapo hub. Check your platform’s current requirements before purchasing.

    Try the lamp behavior first

    • With the lamp safely off, disconnect it, leave its own switch in the intended on position, and reconnect it. A lamp that waits for a touch button may not suit simple smart-plug switching.
    • Check the plug’s physical clearance and keep neighboring sockets accessible. Do not add adapters simply to force a fit.
    • Start with one room and one routine. Keep a practical manual way to turn the light on.
    • Inspect the lamp, cord, socket, and plug before use. Follow both products’ instructions and resolve damage or loose parts.
    • Compare seller return terms before purchase, especially when lamp behavior or network compatibility remains uncertain.

    These options solve different needs; we are not ranking one as universally better. We have not verified that this exact lamp-and-plug combination works together. For smart bulbs, networking, and moving your setup, read our smart-lighting planning guide. Our window privacy and light-control guide covers managing daylight and glare.

    Our recommendation standard: quality, value and renter fit come first, including options that earn us no commission. This comparison is based on research, not our own hands-on testing. How we review products.
  • Narrow Storage for Renters: Two Utility Carts and a Shelf Compared

    A narrow cart can make a corner useful, but the footprint alone does not tell you whether it will work. You also need room to reach its shelves, park it clear of doors, and move it without catching nearby furniture. A shelf unit may need wall anchoring even when it is described as freestanding.

    Research note: Specifications and accessible owner feedback were checked October 9, 2026. We have not assembled or load-tested these products ourselves. Ratings can pool colors or versions and are not a guarantee for one exact model. Local availability and return terms need checking before purchase. Links here are ordinary product links and currently generate no referral commission.

    Two carts and one conditional shelf option

    Exact productOutside size, inchesPublished load limitsRating snapshotKey condition
    IKEA RÅSKOG, black, article 405.821.8117¾ W × 13¾ D × 30⅜ H13 lb per shelf; 40 lb totalAbout 4.6/5; roughly 1,150 IKEA reviewsCheck current-model dimensions and casters
    Brightroom 3 Tier Metal Utility Cart, white, TCIN 8349991417.72 W × 13.78 D × 31.3 H20 lb per shelfAbout 4.7/5; roughly 3,940 Target ratingsInspect parts and finish before assembly
    IKEA VESKEN shelf unit, white, article 403.078.6614½ W × 9⅛ D × 39⅝ H9 lb per shelfAbout 4.7/5; over 5,000 IKEA reviewsMust be secured to the wall as instructed

    A compact rolling option: IKEA RÅSKOG

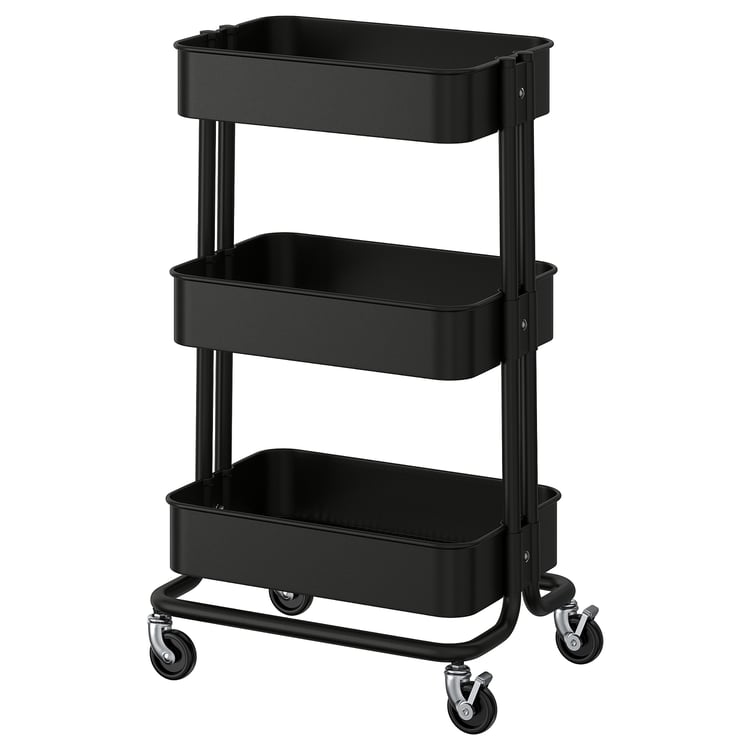
    IKEA RÅSKOG utility cart black 405.821.81
    Photo: ikea.com

    The current black RÅSKOG has steel shelves and locking casters. Respect both the individual shelf limits and the total stated limit. Do not substitute dimensions from an older RÅSKOG version when checking your space.

    Visible owner reports praise useful storage and easy rolling. Critical reports include casters that stopped turning and fasteners breaking during assembly. These do not establish a failure rate. Inspect the wheels and hardware, follow the assembly sequence, and resolve damaged parts before loading. IKEA’s reviews can include other colors or versions.

    Choose it when: the measured parking spot and route fit this current model. Confirm local stock on IKEA’s site. Store frequently used supplies where you can retrieve them without moving the cart every time.

    A slightly taller cart: Brightroom 3 Tier Metal Utility Cart

    Brightroom 3 Tier Metal Utility Cart white
    Photo: target.com

    The white Brightroom cart has mesh shelves, a powder-coated steel frame, and locking wheels. The listing states 20 pounds per shelf. That shelf limit does not establish the capacity of any existing surface you park it on.

    September 2026 verified feedback includes praise for sturdy construction and straightforward assembly. Other recent verified owners report bent shelves, missing pieces, paint damage, or difficult assembly. Inspect the complete parts set and finish first. Do not force misaligned hardware; check exchange or return options when parts arrive damaged. Ratings may combine colors.

    Choose it when: its shelf layout suits what you actually store and you have space to assemble it. Check dimensions rather than choosing by the higher rating alone. We have not independently compared its durability with the RÅSKOG.

    For a shallower gap: IKEA VESKEN, with required anchoring

    IKEA VESKEN shelf unit white 403.078.66
    Photo: ikea.com

    This is a conditional rental option, not a no-drill recommendation. IKEA’s VESKEN instructions require securing it to the wall with the supplied device and suitable fixings. If your lease requires permission for that work, obtain permission first. If you cannot install the required anchoring, choose another storage approach.

    The polypropylene unit snaps together, has approximately 11¾ inches between shelves, and is rated at 9 pounds per shelf. Owners praise its usefulness in narrow spaces. One reports a leg breaking during assembly; another reports a missing top plug. Check the pieces and follow the complete assembly instructions. Tool-free shelf assembly does not remove the wall-fixing requirement.

    Choose it when: the shallow footprint solves your space problem and you can install every required support. Confirm local availability. Avoid squeezing it into a gap that prevents access or inspection.

    Plan the parking spot and the route

    • Mark the full footprint with tape or cardboard. Include handles and the space your hands need to reach stored items.
    • Check doors, drawers, vents, and walking routes. Extra storage is less useful if you must move it to open something else.
    • Follow the assembly instructions and listed load limits. Keep heavier items low where the manufacturer’s instructions allow.
    • Use caster locks when parked, but do not treat them as a substitute for any required anchoring or other stability instructions.
    • Inspect wheels, shelf connections, and fasteners during use. Stop using a damaged support and follow the seller or manufacturer’s remedy.

    For options inside existing cabinets, compare our four cabinet organizers. Our under-bed comparison and door and closet storage guide cover other locations. Start with the apartment storage planning guide if you are deciding where extra storage would help most.

    Our recommendation standard: quality, value and renter fit come first, including options that earn us no commission. This comparison is based on research, not our own hands-on testing. How we review products.

  • Small Apartment Cabinet Storage: Four Organizers Compared

    A crowded cabinet can need a rotating tray, an extra shelf, upright pan storage, or a narrow bin. These solve different problems. Choose the shape that makes the items you use easiest to reach, then compare the actual cabinet opening with the product dimensions.

    Research note: We checked manufacturer specifications and accessible owner feedback on October 9, 2026. The ratings below are retailer snapshots, not our own tests. Some reviews are syndicated from manufacturers or disclosed as incentivized, so appearing on multiple sites does not make them independent evidence. Stock and prices change. These are ordinary product links; this guide currently earns no referral commission.

    Four options for four cabinet problems

    Exact optionUseful forDimensions, inchesRating snapshotMain limitation
    OXO Good Grips 11-inch Turntable, SKU 1071352Reaching items at the back11 diameter × 1.5 highAbout 4.6/5; 147 Target ratingsNeeds room to rotate loaded items
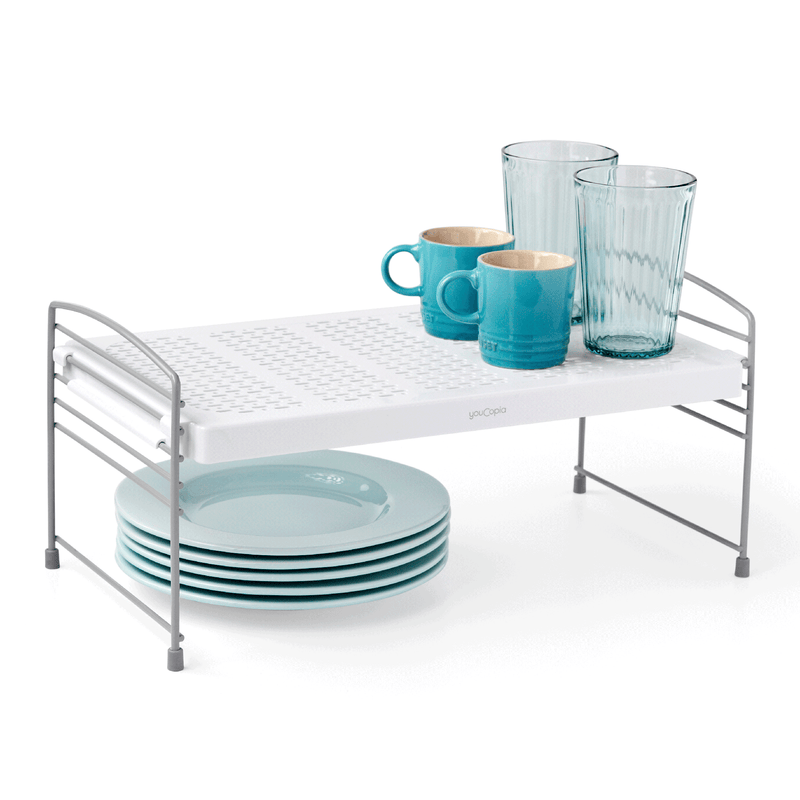
    YouCopia UpSpace Adjustable Shelf, 16-inchAdding a second storage level16 W × 9 D × 7.7 HAbout 4.7/5; 50 Target ratingsCheck height above and below shelf
    YouCopia StoreMore Bakeware Rack, original model 50158Storing pans upright11.5 W × 7.3 D × approximately 6.4 HAbout 4.8/5; 122 Target ratingsStored pans can be much taller
    Brightroom Small Narrow Fridge & Pantry Bin, TCIN 85318247Grouping small items4.44 W × 10.5 D × 4 HAbout 4.8/5; 316 Target ratingsNo lid; hand wash

    Rotating access: OXO Good Grips 11-inch Turntable

    OXO Good Grips 11-inch Turntable
    Photo: oxo.com

    OXO lists a raised rim, a wide base, and non-slip feet for this exact 11-inch model. A January 2026 verified purchaser describes smooth rotation and helpful grip. A June 2024 verified purchaser reports plastic deterioration after five months. That is a durability warning, not a measured failure rate. Other favorable reviews include incentivized feedback.

    Choose it when: small everyday items can rotate without hitting cabinet walls, hinges, or pipes. We did not confirm a manufacturer load rating, so we do not recommend using it as a heavy-bottle platform. Check the matching Target model and current owner reviews.

    A second level: YouCopia UpSpace Adjustable Shelf

    YouCopia UpSpace 16-inch Adjustable Shelf
    Photo: youcopia.com

    The 16-inch UpSpace shelf has adjustable clearance beneath it of 3.7–5.7 inches and a manufacturer-stated 25-pound limit. Assembly involves snapping the shelf onto correctly oriented supports; follow the instructions rather than forcing the clips.

    A May 2025 verified Target purchaser praises its adjustable height. One older verified review reports a broken tab on arrival. Inspect all supports before loading; we would not rely on a damaged clip even if a reviewer continued using theirs. View the exact shelf and retailer feedback.

    Choose it when: there is enough opening width to put the shelf inside, adequate clearance for your items above it, and an unobstructed flat base. A shelf that fits between cabinet walls can still be too wide to pass the hinges.

    Upright pans: YouCopia StoreMore Bakeware Rack

    YouCopia StoreMore Bakeware Rack
    Photo: target.com

    The original StoreMore rack has seven adjustable coated-steel dividers. The number of pans it accommodates depends on their thickness. This selection is the original white model, not the differently sized newer Hero version.

    The matching Target listing has strong overall feedback. A September 2026 owner report praises its stability and adjustable spacing, but that review originates at YouCopia. We do not count it as an independent second test. Coated dividers are a design feature, not our own proof that every pan finish will remain unmarked.

    Choose it when: your upright pans fit beneath the next shelf and can be removed individually through the cabinet opening. Check bulky handles and handles on neighboring cookware. Leave enough room to lift an item without dragging it across another.

    Small groups: Brightroom Small Narrow Fridge & Pantry Bin

    Brightroom Small Narrow Fridge and Pantry Bin
    Photo: target.com

    This specific narrow bin is an open PETG container. Its listed care instruction is hand washing. A July 2025 verified purchaser describes useful pantry organization. Critical feedback includes an owner who expected a lid and another reporting warping after washing; the latter does not establish the washing method or how common that problem is.

    Choose it when: you want small packets or containers grouped in a narrow space and can comfortably pull the loaded bin out. It is not a sealed food-storage container. Do not infer a heavy carrying capacity from its shape; we did not confirm a published load limit.

    Measure the contents as well as the organizer

    • Measure the clear opening between hinges, the usable depth with the door shut, and the height under the next shelf.
    • Add the height and width of the items you plan to store. Allow space to grasp, lift, or rotate them.
    • Mock up the footprint with cardboard before buying. A turntable needs a clear turning path; upright pans need removal clearance.
    • Keep valves, outlets, and maintenance access available. Do not move plumbing to fit an organizer.
    • Read the exact seller’s return terms and inspect supports, dividers, and finish before loading.

    For sink cabinets, start with our under-sink measuring guide. For other locations, see door and closet organizers, under-bed storage, and our apartment storage planning guide.

    Our recommendation standard: quality, value and renter fit come first, including options that earn us no commission. This comparison is based on research, not our own hands-on testing. How we review products.

  • Under-Bed Storage for Renters: IKEA SKUBB or a Rigid Box?

    Under-bed storage works only when the filled container fits through the opening and can be retrieved without a struggle. For occasional clothing and bedding storage, these two highly rated options offer different tradeoffs: a large fabric case or a smaller rigid box.

    How we researched: Specifications and accessible owner reviews checked October 9, 2026. We have not handled or load-tested these products. Displayed ratings are context, not proof of a failure rate; some reviews cover other variants or originate at the manufacturer. Product links go directly to the named seller and currently do not earn us commissions. Prices, stock, and return terms can change.

    Two options at a glance

    OptionOutside sizeDisplayed owner ratingMain limitation
    IKEA SKUBB case, dark gray, 105.910.6435½ × 20¾ × 7½ inches4.8/5; about 2,760 reviewsReported handle failures; ventilated fabric, not sealed storage
    Sterilite 40 Qt HingeLID, model 1394; Target 8501358024 × 19¼ × 7⅜ inches4.8/5; about 160 ratings at TargetHeight and lid-opening clearance; one owner reports cracking

    IKEA SKUBB: consider for seasonal textiles, with a handle warning

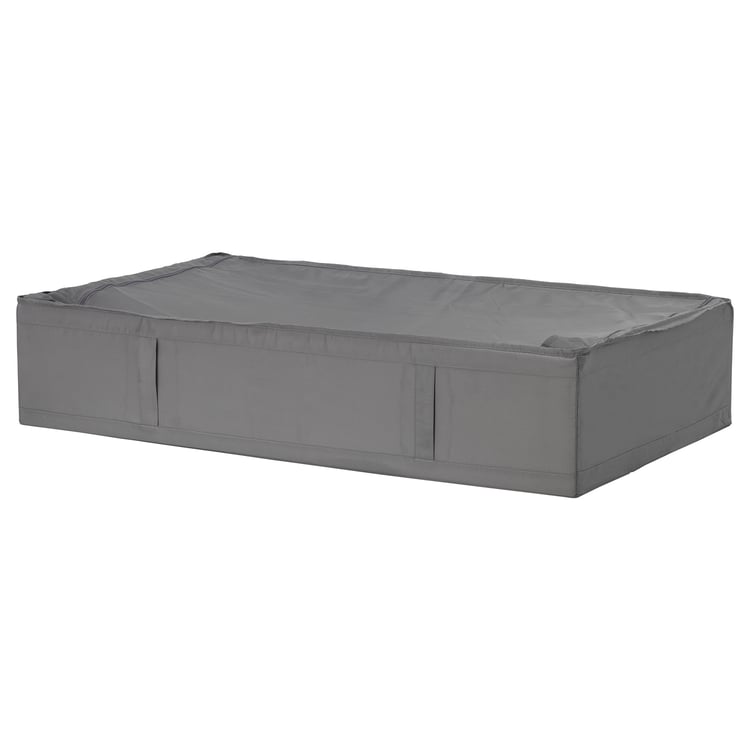
    IKEA SKUBB storage case dark gray 105.910.64
    Photo: ikea.com

    The exact SKUBB case is a broad fabric option for clothes or bedding. Positive owners describe useful under-bed capacity. IKEA’s reviews appear shared across sizes and colors, so the displayed average is not a separate durability test of this exact article.

    Handle warning: Two accessible owner reports explicitly describe failure: Nicole says a handle broke after little use; Jennifer says one tore after only a few retrievals. Another positive reviewer questions handle longevity. These reports establish a concern, not how often it happens or why. We cannot assume rough handling caused it. If frequent handle-based pulling is essential, choose another approach.

    The corner vents mean it is not airtight or waterproof. IKEA specifies vacuuming or a lint roller and says not to wash it. Our suggested role is occasional textile storage, not heavy-item transport; that is a use recommendation, not a tested load rating. Check local delivery or pickup stock before ordering.

    Sterilite HingeLID: a rigid alternative when the height fits

    Sterilite 40 Qt HingeLID storage box model 1394
    Photo: target.com

    The Target listing matches manufacturer model 1394 and its 7⅜-inch exterior height. Do not substitute model 2394, another 40-quart hinged box with different dimensions. The attached lid and latches suit readers who prefer a rigid box.

    Target’s feedback includes positive storage reports, but also a January 2025 verified owner who reports a cracked corner while storing two small blankets. Other complaints concern the box being too tall or the latch being difficult. We do not know the frequency of cracking. Inspect the box and latches on arrival, and check the seller’s return terms.

    An under-bed label does not establish fit. Allow room to open the attached lid, or plan to withdraw the box fully. The interior bottom is smaller than the outside footprint; do not use outside dimensions to estimate what a rigid item will hold. We have not verified a load rating or a waterproof seal.

    Measure the route, not just the empty space

    • Measure the lowest opening, including rails, center supports, slats, and a sagging bed skirt. Leave working clearance above the filled container.
    • Check the full removal path. A nightstand, bed leg, or rug can make an otherwise fitting container impractical.
    • Measure the actual clothing or bedding bundle. Avoid stuffing fabric above its sides or forcing a rigid lid shut.
    • Use a paper outline of the container footprint before buying. Check which side you can reach.
    • Inspect handles, seams, corners, latches, and the bed’s underside before loading. Stop using a damaged container.

    Choose for how often you need access

    For occasional seasonal access, a broad textile case may suit the layout. For more regular access, compare rigid boxes and rolling options, then confirm floor compatibility and clearance. None of these products earns a recommendation solely from its star average.

    For storage you reach every day, compare door pockets and hanging closet shelves. Return to our small-apartment storage guide for other locations.

    Our recommendation standard: quality, value and renter fit come first, including options that earn us no commission. This comparison is based on research, not our own hands-on testing. How we review products.
  • Small Apartment Shoe Storage: Door Pockets or Hanging Closet Shelves?

    A pocket organizer on a closet door and a shelf organizer hanging from an existing closet rod solve different problems. The first uses the back of a door; the second uses a narrow section of hanging space. Choose the location that can accept the organizer without making the room harder to use.

    Research note: These two highly rated options were selected using Target’s product specifications, staff answers, and available owner feedback, checked October 9, 2026. Both display an average around 4.8 out of 5. We have not hands-on tested them, and these ratings do not establish a defect-free product or suitability for every rental. Links are ordinary retailer links, not affiliate links.

    Compare the two approaches

    ProductPlacementRating snapshotMain fit check
    Brightroom 24 Pocket Mesh Shoe Organizer, TCIN 83546651Over a compatible interior doorAbout 4.8/5; roughly 390 ratingsDoor clearance and shoe size
    Brightroom 8 Shelf Hanging Fabric Shoe Organizer, TCIN 83546653On an existing closet rodAbout 4.8/5; roughly 260 ratingsRod support and hanging space

    Door pockets: Brightroom 24 Pocket Mesh Shoe Organizer

    Brightroom 24 Pocket Mesh Shoe Organizer
    Photo: target.com

    View the exact 24-pocket model and owner reviews. Target lists it at 64 inches high, 22 inches wide, and 2.25 inches deep, with a 25-pound limit. A staff answer gives approximate pocket dimensions of 5–5.5 inches wide and 7–8 inches tall. Compare these with your actual shoes.

    The page title’s shoe-pair claim conflicts with a staff answer describing one shoe per pocket. Treat this as 24 pockets, not a promise of space for 24 adult pairs. Available owners praise organization and sturdiness, while one August 2025 reviewer reports damaged fabric on two deliveries. Inspect seams and mesh when it arrives and resolve damage with the retailer before loading it.

    Choose this approach when: the door has adequate top clearance, closes and latches normally with the hooks installed, and has enough swing space for filled pockets. Loaded depth can exceed the empty organizer’s published depth. Bulky footwear may fit better elsewhere.

    Closet shelves: Brightroom 8 Shelf Hanging Fabric Shoe Organizer

    Brightroom 8 Shelf Hanging Fabric Shoe Organizer
    Photo: target.com

    View the exact eight-shelf model and owner reviews. This hangs from a closet rod. Target lists a 56-inch height and 30-pound limit. Its dimension labels are inconsistent, but a staff answer describes each shelf as approximately 6.2 inches high, 7.5 inches wide, and 14 inches deep; another says the total height includes the hangers.

    Visible verified-purchase reviews describe useful shoe storage and organization for gloves or sweaters. Some owners question value at the regular price. Compare current cost and return terms before buying. These reports are individual experiences, not our own load or durability tests.

    Choose this approach when: the existing rod and its supports can carry the organizer and contents, the shelves clear the floor and nearby storage, and using hanging width is worthwhile. Do not assume the organizer’s stated load limit also establishes the capacity of your rental’s rod.

    An alternative for folded clothes: IKEA SKUBB six-compartment organizer

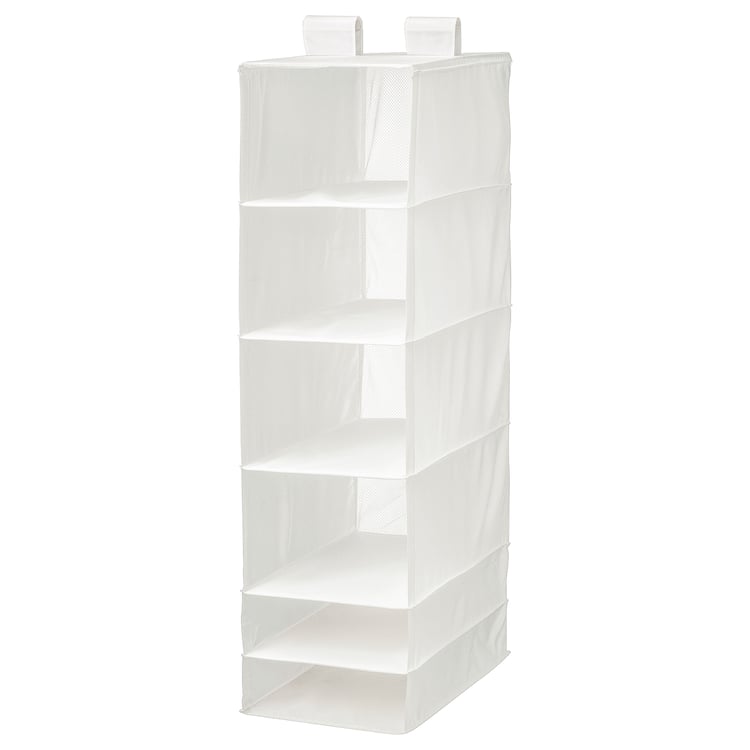
    IKEA SKUBB six-compartment organizer white 403.000.49
    Photo: ikea.com

    If folded clothes need the space more than shoes do, consider the white IKEA SKUBB six-compartment organizer, article 403.000.49. IKEA lists it at 13¾ inches wide, 17¾ deep, and 49¼ high, with hook-and-loop attachment to a closet rod. Its rating snapshot is about 4.7/5 from roughly 1,980 reviews. Optional compartment boxes are not included.

    Owners describe useful storage for folded clothes and linens. One critical report describes the organizer warping within two to three weeks; another mentions awkward rod attachment. These reports do not establish how often problems occur or what load caused them. We have not confirmed a published load limit or tested it ourselves.

    Choose it when: the deeper shelves fit the closet and the existing rod can support the organizer and contents. Start with light folded garments, watch for sagging or strain, and do not treat this as a rigid shelf for heavy objects. IKEA lists vacuuming or lint-roller cleaning rather than washing. This is a researched alternative, not a promise of durability.

    A simple fit check before you order

    • Count and measure the items you intend to store. Do not choose solely by advertised pocket or shelf count.
    • Measure the intended location with the door closed and open. For a closet shelf, include the space below the rod and beside hanging clothes.
    • Confirm the exact model and mounting method. Similar-looking organizers can have different hooks, pocket dimensions, or supports.
    • Read current critical reviews alongside the positive ones. Separate delivery complaints from problems with the product itself, while checking both.
    • Check the purchase seller and return terms so an incompatible organizer can be returned.

    Install empty, then load gradually

    Photograph the door or closet support before installation. Fit the empty organizer according to its instructions and check normal access. On a door, close it slowly and confirm that it latches without extra force. On a rod, look for existing sagging or loose brackets before adding anything. Ask the property manager to address a weak support instead of loading it.

    Add a few intended items and repeat the check. Keep the total within the organizer’s stated limit and any support limits. Inspect again during normal use for rubbing, strain, loose hooks, or stitching damage. If the fit changes under load, unload and reassess; padding does not correct an incompatible bracket.

    For fuller door-clearance checks, read our over-the-door organizer guide. For alternatives across the apartment, see storage ideas without wall damage. Our under-sink measuring guide covers cabinet openings, plumbing, and drawer travel.

    Our recommendation standard: quality, value and renter fit come first, including options that earn us no commission. This comparison is based on research, not our own hands-on testing. How we review products.
  • Rental Move-In Checklist: Document the Condition Before You Upgrade

    Before arranging furniture or installing an upgrade, record how the rental looked when you received it. An empty-room photo is easier to interpret than a picture taken months later behind a bookcase. Your aim is a clear shared record of the original condition and any maintenance issues—not a guarantee about a future deposit decision.

    Start with the property’s own process

    Read the move-in paperwork and any inspection instructions supplied with the lease. Use the landlord’s condition form when provided, record the requested information, and follow the applicable process and deadlines. Requirements vary by location and tenancy; this checklist does not replace those rules.

    Keep the lease, condition report, key inventory, and important correspondence together. If a move-in inspection is offered, walk through the property and note problems rather than signing a form that inaccurately describes everything as satisfactory. Retain the completed report and any acknowledgment you receive.

    Use a consistent photo method

    For each room, take an overview from the entrance, a closer view of each affected area, and a detail showing a specific mark or defect. Preserve the original files and their dates. Include an ordinary point of reference so a close-up scratch can be located later. Do not edit images in ways that change their meaning.

    Name a folder for the property and move-in date, then group photographs by room. A short note such as Kitchen—chip on front counter edge is more useful than a folder of unexplained close-ups. Back up the original files somewhere you can still access if your phone is replaced.

    Room-by-room checks

    AreaRecordReport if present
    Doors and windowsExisting marks, handles, locks, screens, and supplied blindsBroken locks, sticking openings, or damaged glass
    Walls, ceilings, and floorsPaint condition, holes, stains, chips, and floor wearDampness, active leaks, or significant damage
    Kitchen and bathroomCountertops, cabinet interiors, fixtures, and supplied appliancesVisible leaks, damaged fittings, or equipment faults
    Storage and supplied furnishingsShelves, closet rods, hardware, and an item inventoryLoose fittings or damaged furniture
    Safety and accessSupplied alarms and clear access routesMissing or faulty safety equipment and obstructed exits

    Use only normal controls when checking appliances and fixtures. Do not disassemble equipment, open electrical panels, or attempt repairs to investigate a problem. Follow alarm manufacturers’ instructions for routine testing where appropriate. Treat an immediate hazard as an immediate problem; the condition report is not a substitute for getting help.

    Send a specific written maintenance list

    Describe the room, the exact issue, when you observed it, and the relevant photo filename. For example: Bathroom—water visible below the drain after normal sink use; photos Bathroom-04 and Bathroom-05. Send it through the property’s maintenance channel and retain the submission and any reply.

    Separate an existing cosmetic mark from a problem needing repair. Do not hide dampness under shelf liners or install storage around a leak. Ask the landlord to address the issue before making the affected area harder to inspect.

    Record supplied items and permissions

    List keys, remotes, parking passes, appliance accessories, and furnishings supplied with the rental. Store original hardware and bulbs that you are allowed to replace, label the room, and photograph how the items were installed. Obtain written permission where a proposed change requires it; the word removable on a package does not override a lease.

    Create an upgrades log with the installation date, product, mounting method, approval if required, and before photos. Save the removal instructions with it. This turns moving out into a repeatable checklist instead of trying to remember which curtain rod or shelf came with the property.

    Keep a small first-week kit

    • Phone or camera, charger, and a backup location for original photos.
    • Measuring tape and a notebook or simple room-by-room document.
    • Labels and a container for original removable parts.
    • The property’s inspection form and maintenance contact details.

    Once the original condition is documented and needed repairs are underway, use our Start Here guide to prioritize upgrades. Begin with the daily problem you want to solve, then choose a reversible approach that fits the property. Our 15 portable renter upgrades offers a starting shortlist.

  • Smart Lighting for Renters: Bulbs, Plugs, or Portable Lamps?

    You do not need to replace a wall switch to make a rental’s lighting easier to use. Smart bulbs, suitable smart plugs, and portable smart lamps solve different problems. Choose the smallest setup that does what you need before committing every room to one app or system.

    Decide what you want the light to do

    Write down a practical goal: switch a reading lamp on from the sofa, dim a bedroom lamp, turn lights on at a scheduled time, or adjust white light throughout the day. A plug may be enough for simple on and off. Dimming or color changes usually call for a compatible smart bulb or a lamp with those functions built in.

    ApproachGood starting useCheck before buying
    Smart bulb in a compatible lampDimming or adjustable light from an existing fixtureBulb base, fixture limits, dimmer compatibility, and connectivity
    Smart plug with a conventional lampScheduled or remote on/off controlPlug rating, lamp switch behavior, socket clearance, and network
    Portable smart lampA complete movable lighting unitControls, app requirements, replacement options, and placement

    Start with one plug-in lamp

    A table or floor lamp is easy to take with you and does not require changing the property’s wiring. Select one in a room you use daily. Check its condition, socket type, and maximum permitted bulb rating. Follow the fixture and bulb instructions for enclosed shades, heat clearance, and use with dimmers.

    For a smart bulb, the lamp generally needs to remain powered for app control to work. Explain this to other occupants: turning the physical lamp switch off can make the bulb unreachable. Provide a convenient physical control where the system supports one, rather than requiring everyone to open a phone app each time.

    Check smart-plug compatibility with the lamp

    A conventional lamp with a mechanical switch can often be left in its on position while a suitable smart plug controls the power. A lamp with an electronic touch button may stay off after power is restored. Test that behavior using the lamp’s normal power controls before purchasing a plug for it.

    Use a plug rated and approved for the intended load and follow the manufacturer’s limits. This guide is about appropriate lighting loads, not heaters or other high-power appliances. Check that the plug does not obstruct a neighboring socket or put strain on the outlet. Do not stack adapters to overcome an awkward fit.

    Read the network requirements for the exact model

    Wi-Fi, Bluetooth, Zigbee, and Thread are different connection methods. Some products need a hub or compatible controller, while others support direct phone control. Shared building Wi-Fi or a network with a browser sign-in page may not support the device’s normal setup. Confirm the requirements and your ability to connect it before buying.

    As one example, Philips Hue’s current setup guide separates Bridge, Bluetooth, and direct Matter setup paths for appropriate models. Do not assume that every bulb with the same brand name has the same connection requirements or features. We have not hands-on tested every model; this is a planning guide, not a product ranking.

    A five-step first-room setup

    • Choose one everyday lamp and one useful goal.
    • Confirm the bulb or plug fits the lamp and your electrical and network requirements.
    • Install using the manufacturer’s instructions and complete any required updates.
    • Use clear device names such as Bedroom Reading Lamp.
    • Test manual control, app control, your intended schedule, and behavior after a normal power interruption.

    Check which functions continue without internet or when your phone is away. These vary by device and setup. Keep an ordinary way to turn on enough light to move around safely. A smart-light scene should be a convenience, not your only way to illuminate an exit.

    Moving out

    Store original bulbs in labeled packaging. Restore the original lighting arrangement when you leave, and remove or reset devices according to their instructions before transferring them to another person. At the next home, reassess coverage and network requirements before assuming old schedules and room names still make sense.

    For other reversible improvements, read 15 upgrades you can take with you. For window light and privacy, see our no-drill curtain guide.

    Compare two specific renter-lighting options

    Our task-lamp and smart-plug comparison covers the IKEA FORSÅ and Tapo P125M, including bulb requirements, owner feedback, and network checks. They address different needs; the guide does not claim we tested them ourselves or that the pair is a verified combination.

  • Over-the-Door Organizers for Renters: Check Fit, Clearance, and Door Damage

    An over-the-door organizer can add useful storage without mounting a cabinet. It can also scrape a frame, keep a door from latching, or hit the wall when the door opens. The important test is how the door works with the organizer fitted and loaded—not whether the empty hanger slips over the top.

    Choose the door before choosing the organizer

    Start with an ordinary interior closet or pantry door that has room to open. Avoid adding hardware to a fire-rated, self-closing, or required exit door without confirmation from the property manager that the specific installation is permitted and appropriate. An organizer must not interfere with closing, latching, or safety hardware.

    Photograph the top edge, frame, hinges, and both sides before installation. Check whether the door already rubs or fails to latch. A storage accessory cannot correct an existing alignment problem, and loading a troublesome door makes it harder to identify the cause of new damage.

    Measure four kinds of clearance

    • Door thickness: compare the actual thickness with the exact bracket’s permitted range.
    • Top gap: allow for the bracket where it passes between the door and frame; do not force a door against it.
    • Loaded depth: include the bulge of filled pockets or the contents of baskets.
    • Swing space: check the door handle, nearby walls, shelving, and anything behind the open door.

    Also measure the organizer’s full height. A rack that hangs below a knob or around a coat hook can create a collision even when its advertised width fits. Where a product uses top and bottom attachments, compare both with your door; buying only the top-hook component may not create a complete, secure system.

    Choose a type for the items you own

    Organizer typeUseful contentsFit concern
    Fabric pocketsLight shoes and small accessoriesFilled pockets can project farther than the empty organizer
    Rigid basketsAppropriately sized pantry or cleaning itemsBasket depth and contact with the door or frame
    Simple hooksLight bags, towels, or clothing within the ratingLoads can swing and rub the door
    Modular rackA planned mix of baskets and accessoriesComplete assembly, bracket compatibility, and total load

    Do not select a rack only by its number of pockets. Count what you actually plan to store, estimate the load using product weights or a household scale, and stay within the manufacturer’s limits. Keep bottles upright where required and avoid arrangements that spill when someone moves the door normally.

    Test the empty installation first

    Assemble the organizer exactly as directed and fit all required stabilizers. Close the door slowly without pushing harder than usual. Check the top edge and both sides for contact, then confirm that the latch works. Open it through the range you normally need. If the bracket rubs, the door sticks, or the rack hits a wall, stop before loading it.

    Adding felt can help at approved contact points, but it can also make an already tight top bracket thicker. Do not treat padding as a cure for poor fit or replace a required manufacturer fitting with a homemade substitute. The installation must remain stable and the door must work normally.

    Load gradually and recheck

    Place a few intended items into the organizer and repeat the closing and opening check. Then add the remaining load within the rating. Keep the door’s movement gentle and inspect again after normal use. New rubbing, a loose attachment, or a pocket dragging on the floor is a reason to unload and reassess.

    Elfa Utility White Mesh Pantry Over the Door Rack, an example of the modular Elfa system
    Elfa modular-rack example, SKU 10072056. Photo: The Container Store. Components and mounting methods vary; this is not a tested product recommendation.

    For a modular example, The Container Store’s Elfa assembly instructions distinguish over-door mounting from screw-mounted methods. Follow the instructions for the exact components sold in your region rather than assuming every rack installs the same way.

    A useful alternative when the door fails the test

    Choose a low freestanding cart, a shelf in an existing closet system, or a small lift-out bin instead. A renter-friendly purchase earns its place by improving storage while preserving the room’s normal function. An organizer that makes the door awkward every day is not a good trade.

    See our small-apartment storage guide and under-sink measuring guide for other ways to use overlooked space.

  • Under-Sink Storage for Renters: A Measuring Guide Before You Buy

    A cabinet’s nominal width is not the space available for an organizer. Sink bowls, drain traps, supply lines, hinges, and door openings divide an under-sink cabinet into smaller usable areas. A few careful measurements can prevent buying a drawer that fits inside but cannot pull out.

    Empty the cabinet before measuring

    Remove stored items and look for dampness, active drips, swollen cabinet flooring, or damaged pipework. Report maintenance problems before organizing around them. Storage should not hide a leak or make a shutoff valve difficult to reach. Do not move plumbing, wiring, or attached equipment to make a purchased organizer fit.

    Set aside products you no longer use. Keep cleaners in their original labeled containers and follow their storage instructions. A kitchen cabinet is not automatically a suitable place for every chemical, especially in a home with children or pets. Follow product-specific separation and access requirements rather than combining everything in one convenient bin.

    Record five measurements

    • Clear opening width: measure between the door frame, hinges, and center divider, not only between the cabinet walls.
    • Usable depth: measure from the closed door to the first rear obstruction.
    • Usable height: measure separately under the sink bowl and beside it.
    • Drawer travel: check the space outside the cabinet and the opening a pull-out must pass through.
    • Maintenance access: identify valves, drain connections, and equipment that must remain reachable.

    Write the measurements beside a simple sketch. Mark the drain trap and supply lines as occupied space. Take a photo from the front with the doors open; this makes product diagrams easier to compare. Include the tallest bottle you want to store, since an organizer can fit while its loaded upper shelf does not.

    Match the storage style to the space

    StyleUseful forMain limitation
    Lift-out caddyDaily-use products and fast maintenance accessNeeds room to lift and carry without hitting the sink bowl
    Separate shallow binsIrregular spaces on either side of pipesCan hide leaks if packed tightly or left unchecked
    Freestanding two-tier rackA clear area with adequate heightUpper tier may conflict with plumbing or bottle height
    Installed pull-outA clear opening and approved installationCheck whether screws or other permanent attachments are required

    For a rental, start with lift-out or freestanding options when they meet the need. Some products marketed as cabinet organizers require a fixed track. Read the assembly instructions before ordering; a product being removable later does not mean installing it leaves the cabinet unchanged.

    Test with a cardboard footprint

    Cut cardboard to the organizer’s listed footprint and place it in the proposed position without pressing on plumbing. Add a second piece at its planned shelf height if needed. Open and close the doors. For a pull-out, simulate its path through the frame and into the room. This inexpensive mock-up reveals conflicts that a single width measurement misses.

    Choose a caddy or bin with a base that is suitable for the cabinet finish. A wipe-clean tray can help contain minor product spills, but it does not repair or waterproof a leaking cabinet. Leave enough visibility to notice new water and enough space to remove the tray without dismantling plumbing.

    Arrange for access, not maximum density

    Keep frequently used items at the front and group occasional items in removable containers. Put labels on the front so you can find things without stacking bottles behind pipes. Do not hang storage from plumbing or rest a loaded shelf against a drain connection. If removing one bin opens the entire maintenance area, that is often more useful than gaining one extra shelf.

    What to check on a product listing

    • External dimensions and the internal shelf clearance.
    • Installation method, including every supplied screw or adhesive fitting.
    • Capacity for the complete organizer and individual shelves.
    • Whether a drawer clears a cabinet frame or center divider.
    • Cleaning instructions and whether the base lifts out.
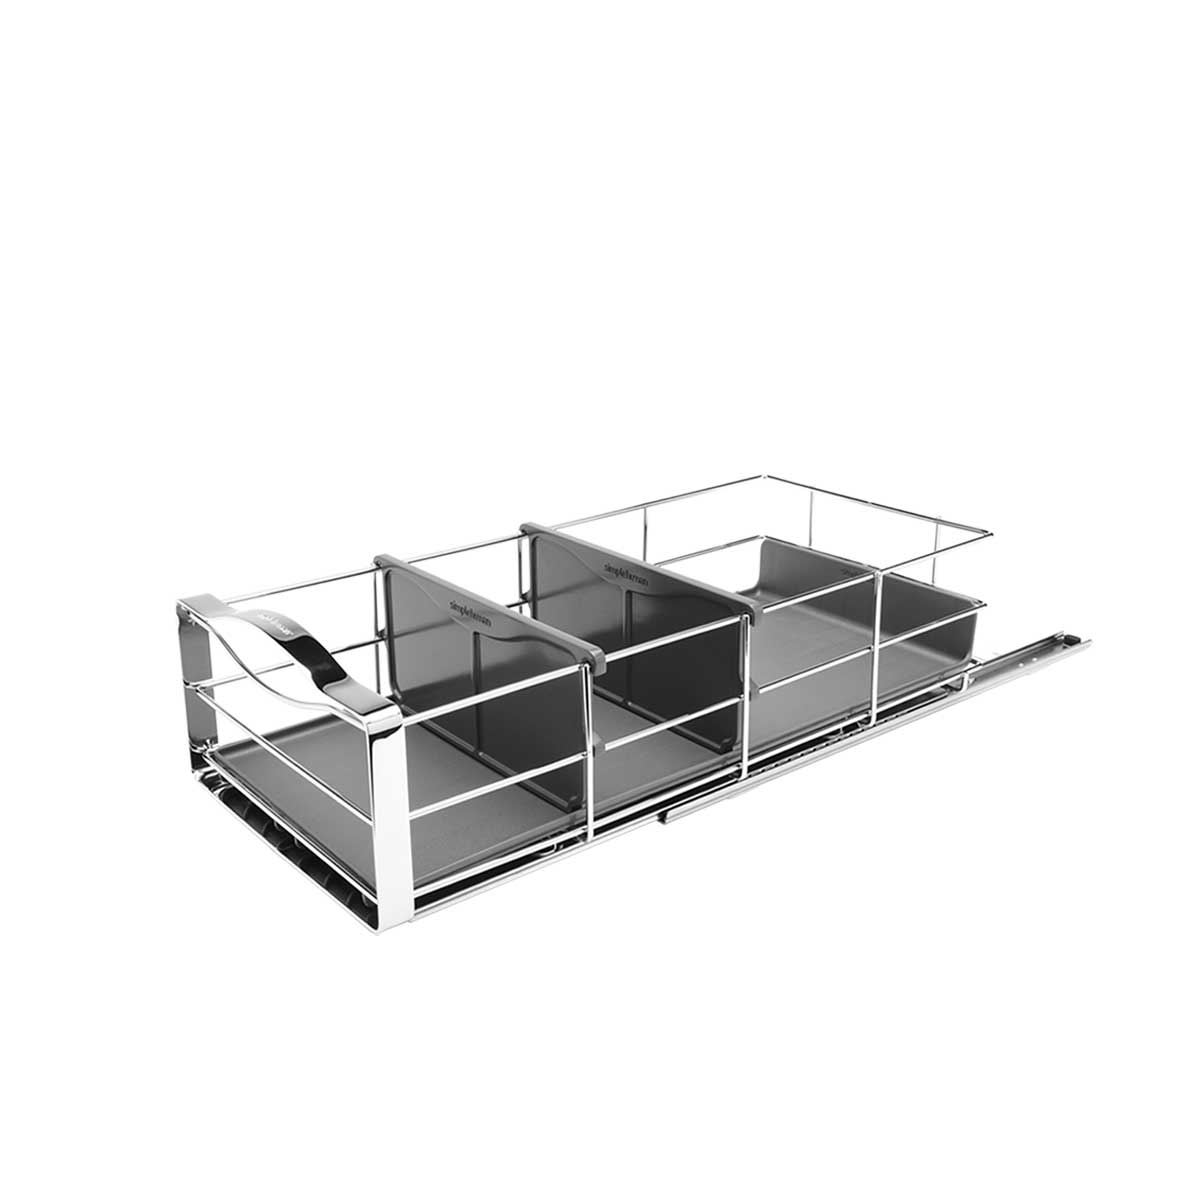
    simplehuman 9-inch pull-out cabinet organizer
    Photo: simplehuman. Measuring example; verify installation requirements and landlord permission.

    Manufacturer pages such as Simplehuman’s cabinet-organizer page provide model information and dimension diagrams. Use those details to test fit; a product name or nominal size alone is insufficient. We have not hands-on tested that organizer and do not present it as a universal under-sink recommendation.

    For the rest of your apartment, explore our small-space storage guide and over-the-door organizer checklist.

    Ready to compare specific products? Our four-option cabinet storage comparison covers a turntable, adjustable shelf, bakeware rack, and narrow bin. Check loaded height, plumbing clearance, and each product’s limits; these are not universal under-sink solutions.