Author: The Renter Upgrade Editorial Team

  • No-Drill Curtains for Renters: Choose the Right Mount Before You Buy

    Ready to compare specific mounts? See our NoNo vs. Umbra Anywhere comparison for two researched options, owner feedback and the fit and load checks that determine whether either works in your rental.

    A no-drill curtain setup works only when the mounting method matches both the window and the fabric. A light sheer in a recessed window is a different job from heavy blackout panels across a wide opening. Start with the mounting surface and the total hanging weight, then choose the curtains.

    Measure the window and the load

    Record the width of the recess, the depth available for a rod, and the height from the intended rod position to the floor or sill. Open the window and move any existing blinds through their full range. A rod that fits the empty opening may still obstruct a sash, blind wand, or handle.

    Weigh or obtain the listed weight of both panels, the rod, and any rings. Check how the manufacturer expresses capacity: per hook, per pair, or for the complete installed system. Do not assume that adding hooks automatically increases a system’s rating, or that a rod’s maximum extension supports its heaviest advertised load.

    Mounting approachConsider it whenCheck first
    Tension rod inside the recessYou have opposing, suitable surfaces and relatively light curtainsRod span, load rating, end-pad contact, and window operation
    Adhesive curtain hooksThe wall is smooth and compatible with the exact adhesive systemPaint condition, combined load, rod diameter, and removal access
    Existing brackets or landlord-approved hardwareYou need heavier curtains or already have usable fittingsRod fit, hardware condition, and permission before any changes

    Option 1: a tension rod

    A tension rod presses against the sides of a recess. It avoids adhesive on the wall, but pressure and friction can still mark paint or trim. Use it only where the end pads make full contact and the manufacturer allows the surface. Do not increase pressure indefinitely to compensate for a slipping rod.

    Inside-mounted curtains can leave gaps around the edges. If complete darkness is your priority, consider how you will manage those gaps before buying heavier fabric. Check the setup with the curtains closed, drawn aside, and moved normally; sagging, sliding pads, or fresh marks are reasons to stop and reassess.

    Option 2: adhesive hooks made for curtains

    Purpose-built curtain hooks are different from ordinary utility hooks. For its curtain-rod hooks, Command’s U.S. instructions specify suitable surfaces, at least seven days after painting, and a one-hour wait after installation. They exclude textured walls, wallpaper, brick, and rough surfaces, and say not to hang the setup over a bed. Follow the instructions for the exact model you buy; these limits are not universal to every adhesive product.

    Allow space to reach the release tabs later. Curtains that hide a tab are fine only if the tab remains accessible after removing the fabric and rod. Photograph the wall first, test an inconspicuous area where appropriate, and check the condition of the existing paint. Removable adhesive is not a guarantee against damage to poorly bonded paint.

    Option 3: use what is already installed

    Existing curtain brackets can be the most straightforward choice. Check that they are secure and that the rod and fabric fit their intended use. Store any original rod or curtains you replace, label their room, and photograph the original arrangement. If the hardware needs repair, contact the landlord rather than adding screws without approval.

    A practical buying order

    • Measure and photograph the window, trim, and existing hardware.
    • Choose the mounting method and read its capacity and surface limits.
    • Select a compatible rod and curtains within the complete system’s rating.
    • Install according to the manufacturer’s instructions and observe the waiting time.
    • Check window access, normal curtain movement, and any slipping or surface marks.

    Removal and moving

    Take the curtain weight off before removing a rod or hooks. For stretch-release adhesive, follow the manufacturer’s specified direction; pulling outward can damage paint. Use fresh compatible strips when reinstalling if required. Keep the product instructions with the hardware so the next installation is not based on memory.

    For other approaches to light and privacy, see our rental window privacy guide. If a mount cannot safely carry the curtains you need, choose a lighter treatment or ask for permission for an appropriate permanent installation.

    Product-selection update

    Command curtain rod holders black TCIN 89197812
    Photo: Target. Shown for identification; this model is not a shortlisted purchase pick.

    Checked October 9, 2026: the black Command curtain-holder listing, TCIN 89197812, displays about 3.4/5 from 372 ratings. Accessible owners report both successful installations and problems with adhesion or paint damage during removal. Those reports do not establish a failure rate. We have not selected this model as a top-rated purchase pick. Follow the exact product’s surface, rod, load, and removal instructions if assessing it; a removable label does not guarantee that every painted surface will remain unmarked.

  • No-Drill Door Security Devices for Renters: 5 Options Compared

    NO-DRILL SECURITY

    Five removable door-security options for renters: compare portable locks, full-size and folding bars, and an alarmed wedge before choosing a device for your exact door.

    Editor’s note: This is a research-based comparison of manufacturer specifications and installation instructions, checked October 9, 2026. We have not hands-on tested these devices or measured their resistance to forced entry. The links below lead to manufacturer information and are not affiliate links.

    The Short Version

    Use casePickImportant limitation
    Smallest travel optionAddalock OriginalInward-opening hinged doors; strike-plate fit varies
    Floor-mounted portable braceDoorJammer PortableNeeds the correct under-door gap and a flat floor
    Full-size apartment or patio-door barSABRE Adjustable Door Security BarBulkier and less convenient for travel
    Folding bar for easier storageMaster Lock 270DFloor placement and handle fit still matter
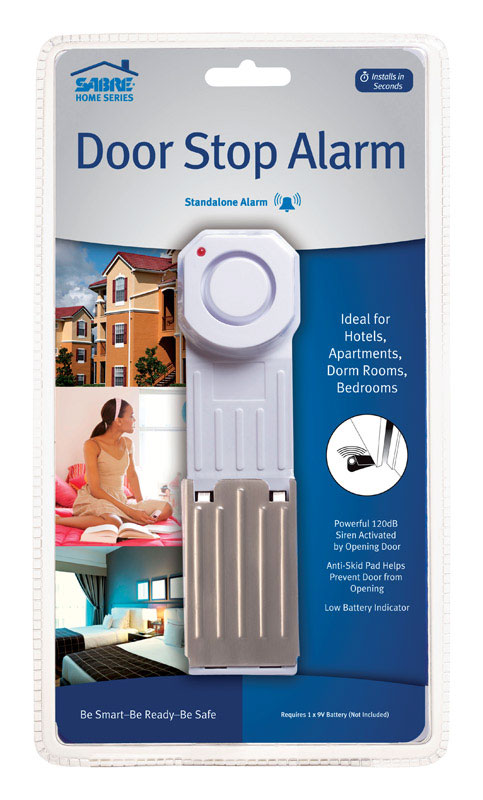
    Portable audible alertSABRE HS-DSA Door Stop AlarmNeeds a battery and compatible door gap; indoor use

    None of these devices replaces a working deadbolt, a secure door frame, smoke-safe egress, or permission required by your lease. They are secondary layers used from inside the rental.

    1. Addalock Original — Compact Strike-Plate Option

    Addalock Original portable door lock
    Photo: addalock.com

    The Addalock is a small plate-and-handle device that fits into the existing strike opening before the door closes. Its strongest advantage is portability: it stores in a small travel pouch and requires no tools, batteries, or permanent installation.

    • Good fit for: renters, dorms, hotels, and travel where pack size matters.
    • Construction: the manufacturer specifies chrome-plated carbon steel.
    • Watch for: it is intended for inward-opening hinged doors and depends on compatible latch and strike-plate geometry.
    • Emergency use: practice removing it quickly in the dark before relying on it overnight.

    Our take: Start here if you want the smallest, simplest device and you can test it on the exact door. It is not the right choice for outward-opening doors, sliding doors, or a door whose strike plate does not provide enough room.

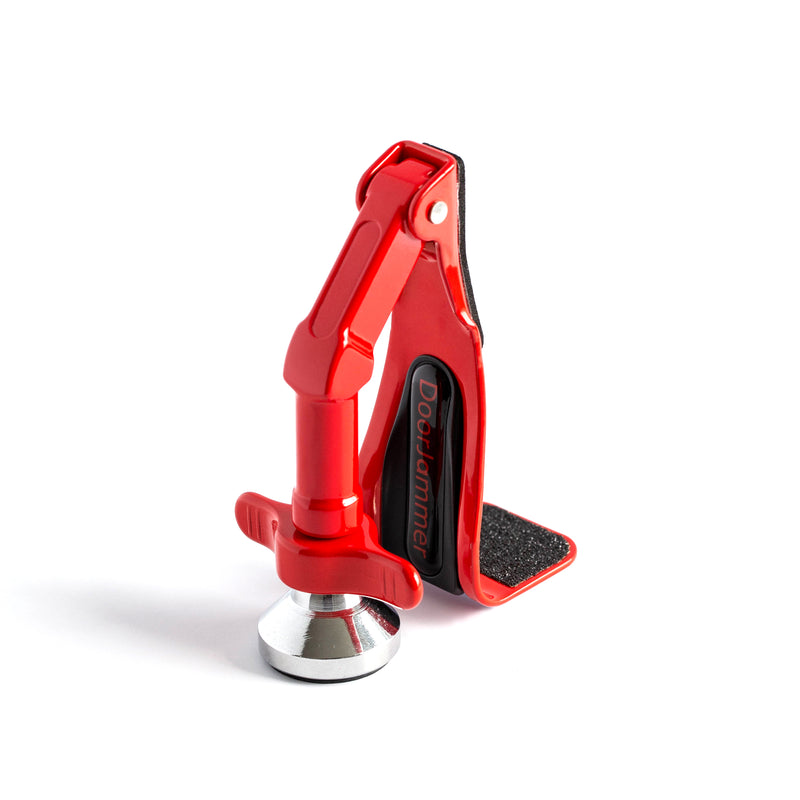
    2. DoorJammer Portable — Portable Floor Brace

    DoorJammer braces an inward-opening door against the floor rather than using the strike plate. The current manufacturer listing describes it as tool-free and compact, with a listed weight of about 0.46 pound.

    • Good fit for: doors with compatible bottom clearance where a strike-plate device does not fit.
    • Door direction: inward-opening only.
    • Floor requirement: the foot needs a flat, stable surface.
    • Clearance warning: the U.S. manufacturer FAQ currently lists a minimum gap of 1/4 inch and a maximum of about 1.3 inches for this model. Check the exact model and regional instructions before ordering.
    • Watch for: raised thresholds, thick rugs, and uneven flooring can prevent proper placement. The manufacturer’s installation page says not to use these devices with weather seals or protective strips, while its FAQ is more permissive if clearance is adequate. Follow the stricter installation guidance and ask the manufacturer about your exact door before buying.

    Our take: This is the most interesting travel-size option when you prefer a brace under the door instead of a plate at the latch. Door and floor compatibility matter more than the marketing photos suggest.

    3. SABRE Adjustable Door Security Bar — Full-Size Door Bar

    SABRE’s adjustable steel bar uses a padded fork under a hinged-door handle or, with its top door-knob cup removed, sits in the track of a compatible sliding patio door. The manufacturer lists an adjustable range of 28.5 to 45 inches for hinged doors, making it far more adaptable than a tiny travel lock—but also much bulkier.

    • Good fit for: a rental where the bar will stay near the entry door instead of living in a suitcase.
    • Two uses: standard hinged doors and many sliding patio doors.
    • No drilling: installation relies on floor traction and correct adjustment.
    • Watch for: slippery flooring, unusual handle height, weak interior trim, and poor placement can reduce effectiveness.

    Our take: This is a practical full-size option for everyday apartment use when storage space is not a concern and you want one device that can also work on a patio slider.

    4. Master Lock 270D — Folding Bar for Storage and Travel

    The 270D folds in half, offering another approach when storing a full-size bar is inconvenient. Master Lock lists a 25.5–43.5-inch adjustment range and a weight of 2 pounds. It is a larger device than a pocket-size strike-plate lock.

    • Consider it for: a compatible hinged door or patio slider when folding storage is useful.
    • Fit check: the installation sheet specifies foot placement based on knob height and says not to place the bar on loose rugs or mats.
    • Sliding-door setup: remove both the yoke and foot and follow the track-installation instructions.
    • Evidence limit: we have not tested this model. The manufacturer’s strength comparison with its 265D is not an independent comparison with SABRE or a guarantee for your door.

    Our take: Compare this with the SABRE bar if storage is your main concern. Choose by exact fit and permitted placement; the folding design does not resolve a slippery floor or incompatible handle.

    5. SABRE HS-DSA — Door Stop with an Audible Alarm

    The HS-DSA manual describes an indoor wedge with a pressure-triggered alarm rated at 120 dB. It uses one 9V battery and has a low-battery indicator. This adds an audible alert to the shortlist; it is not a monitored alarm service.

    • Consider it for: an inward-opening door where a portable audible alert is useful.
    • Measure first: the current manual specifies a door-to-floor gap of 0.3–1.25 inches. Retailer listings can differ; follow the instructions supplied with your exact unit.
    • Placement: the door must engage the metal plate, and the bottom pads need firm floor contact.
    • Trade-offs: maintain the battery, use only indoors in dry conditions, and follow the hearing warnings when testing.

    Our take: An option for adding noise, with door fit and floor grip still essential. We have not measured its alarm output or forced-entry resistance.

    How to Choose the Right Type

    1. Confirm the door opens inward. Addalock and DoorJammer will not secure an outward-opening door.
    2. Inspect the threshold and floor. Floor braces need solid contact; thick carpet, mats, and raised weather seals can interfere.
    3. Measure before buying. Check the gap under the door, handle height, and available floor distance.
    4. Test emergency removal. Everyone in the home should be able to disengage the device quickly without tools.
    5. Check the lease and building rules. A removable device is usually less intrusive, but it must not violate fire-egress or property policies.

    What Outside Testing and Owner Reports Tell Us

    DoorJammer: exterior-door clearance is a real purchase check. In Mark Wolfe’s hands-on comparison for Bob Vila, the tester could not fit the DoorJammer under either exterior door because of the weather stripping and door sweep. It held on the bedroom and bathroom doors used in that test. That supports checking your exact threshold before buying; it does not establish performance on every rental door or a certified forced-entry rating. The article’s accessories may differ from the current package, so verify the exact model and contents with the manufacturer.

    SABRE: an owner report flags floor grip. A February 17, 2026 owner review displayed on Lowe’s HS-DSB review page reports that the foot slid on their linoleum floor and that the available length did not suit their intended placement. This is one person’s experience, not a measured failure rate. The same review also appears on other retailers through SABRE, so it should not be counted as several separate complaints. Confirm the exact model, adjustment range, and permitted placement before ordering.

    How we use reviews: Manufacturer instructions establish intended use and fit requirements. Identifiable hands-on tests add observations about the setup tested. Owner reviews help identify questions to investigate, but feelings of security, delivery complaints, and star averages do not prove resistance to forced entry. We distinguish different model versions and disclosed promotional reviews, and we label these findings as outside evidence rather than our own testing. Sources checked October 9, 2026.

    What We Would Test Before Final Rankings

    Before converting this research shortlist into a final hands-on ranking, we would test installation time, compatibility across common apartment doors, release speed during an emergency, floor grip, door and trim marking, repeatability, and how easily each device can be defeated by incorrect placement.

    Safety note: A secondary security device can slow unwanted entry, but no portable product guarantees protection. Do not use one in a way that blocks required emergency egress or prevents other occupants from leaving safely.

    Sources and Installation Instructions

    Our recommendation standard: quality, value and renter fit come first, including options that earn us no commission. This comparison is based on research, not our own hands-on testing. How we review products.

  • 15 Renter-Friendly Upgrades You Can Take With You When You Move

    START HERE

    A practical room-by-room list of upgrades that make a rental safer, calmer, and easier to live in—without leaving your investment behind.

    Renting does not mean living with every inconvenience exactly as you found it. The best upgrades solve a daily problem, avoid permanent construction, and can move with you to the next place.

    Before you install anything: read the lease, photograph the original condition, test adhesives in a hidden area, follow weight limits, and keep every original screw or part you remove.

    Security and Entry

    1. Add a removable inside-door security device

    A portable lock or correctly fitted security bar adds a second layer while you are home. Confirm door direction, floor clearance, and emergency-release speed before relying on one.

    2. Use a renter-safe video doorbell mount

    Door-mounted and no-drill brackets can hold compatible battery doorbells without screwing into the frame. Check hallway-camera rules, neighbor privacy, and whether the mount interferes with door closing.

    3. Add battery-powered entry lighting

    Motion-activated lights can improve a dark entry, closet, or stair area. Magnetic or freestanding options are easier to remove than aggressive adhesive strips.

    Comfort and Privacy

    4. Hang curtains with tension rods or no-drill brackets

    Blackout or thermal curtains can improve sleep, glare, privacy, and temperature control. Measure the opening and make sure the mounting method can safely hold the fabric’s weight.

    5. Apply removable privacy film

    Static-cling window film adds daytime privacy without adhesive. It is especially useful for bathrooms and ground-floor windows, although nighttime privacy still depends on lighting and film type.

    6. Add rugs and washable pads for noise control

    Large rugs soften hard rooms and reduce impact noise. Use floor-safe pads—some rubber backings can react with vinyl or finished wood over time.

    7. Use a portable air purifier sized for the room

    A correctly sized purifier can help with airborne particles, smoke, and pet dander. Compare replacement-filter cost and noise at the speed you will actually use.

    Storage and Organization

    8. Put unused door space to work

    Over-the-door organizers can add pantry, cleaning, shoe, or bathroom storage. Add felt pads where metal contacts the door and confirm there is enough clearance to close it.

    9. Build upward with freestanding shelving

    Tall shelving uses vertical space without built-ins. Follow anti-tip guidance; if wall anchoring is required for safety, get landlord approval rather than skipping it.

    10. Standardize under-bed storage

    Low, lidded containers turn unused space into seasonal storage and make moving easier. Measure bed clearance and leave airflow around items that can trap moisture.

    11. Add a rolling utility cart

    A narrow cart can become a pantry, coffee station, bathroom shelf, craft organizer, or movable work surface—and it remains useful in a completely different floor plan.

    Technology and Daily Convenience

    12. Improve Wi-Fi placement before buying equipment

    Move the router into the open, raise it off the floor, and keep it away from metal and dense obstructions. If coverage still fails, a mesh system is usually more portable than running new cable through a rental.

    13. Add plug-in smart lighting

    Smart bulbs and plug-in lamps add schedules, dimming, and automation without replacing switches. Save the original bulbs and avoid devices that require modifying the fixture.

    14. Create charging where you actually need it

    A quality surge protector or clamped desk charging station can fix awkward outlet placement. Do not daisy-chain power strips or conceal cords where heat can build up.

    15. Use removable cable management

    Reusable ties, floor cord covers, and gently removable clips make a setup safer and easier to move. Test adhesive clips first and remove them according to the manufacturer’s directions.

    Choose Upgrades That Earn Their Space

    Before buying, ask three questions: Does this solve a problem I notice every week? Can I install and remove it safely? Will it still be useful in a different home? If all three answers are yes, it is probably a better renter upgrade than something designed only for the current floor plan.

  • Small Apartment Storage Ideas That Won’t Damage Your Walls

    In a small rental, the easiest storage gain may come from using space you already have: the back of a door, the area under a bed, a narrow corner, or the top of a cabinet. Before buying organizers, measure the space and decide what needs to be stored there. That prevents bulky products from becoming clutter themselves.

    Use the floor space you already own

    • Under-bed bins: Measure clearance from floor to bed frame, including any center support. Lidded containers help keep stored items cleaner; soft bags can fit irregular spaces.
    • Stackable shelf risers: These can create a second level inside a cabinet or closet without attaching anything to the wall. Check shelf depth and weight capacity.
    • Freestanding narrow shelves: A slim unit can use a gap beside a refrigerator, desk, or wardrobe. Secure tall furniture according to manufacturer guidance and building rules; do not assume a freestanding item is safe from tipping.
    • Over-door organizers: Measure door thickness and clearance on both sides. Check whether the hooks interfere with closing, latching, or the door’s fire-rated function.
    • Furniture with storage: Ottomans, benches, and bed drawers can replace separate containers. Check dimensions and whether drawers can open fully in the room layout.

    Try removable hanging carefully

    Adhesive hooks and strips can be useful for lightweight items on compatible surfaces, but capacity depends on the product and the wall finish. Follow the exact surface preparation, weight rating, spacing, and cure-time directions. Avoid hanging fragile or heavy objects over beds, seating, or walkways. If the surface is textured, damp, dusty, or recently painted, the product may not hold as expected.

    Make closets work harder

    Use matching hangers to reduce wasted width, add a second hanging rod only if the closet supports it, and group seasonal items in labeled bins. A small shelf divider can keep folded clothes upright. Keep heavier items low and leave access to vents, electrical panels, and plumbing shutoffs.

    Plan before you buy

    1. Measure the exact width, depth, and height of the target space.
    2. Check doors, drawers, outlets, vents, and walking paths.
    3. Choose storage that can be reused after your next move.
    4. Read load limits and anchoring instructions, especially for tall furniture.
    5. Keep a small margin for access; a full cabinet is harder to use than an organized one.

    The takeaway

    Start with a quick inventory and a tape measure. Under-bed storage, cabinet risers, narrow freestanding units, and carefully chosen over-door organizers often add capacity without a renovation. Use adhesive products only within their instructions, and prioritize stability and clear exits over squeezing in one more container.

    Compare twelve researched storage options

    Our four product guides cover different apartment storage needs. Each identifies the exact model, explains owner feedback and fit limits, and links to the source. These are research-based comparisons, not our own hands-on tests. A high average rating does not establish that a product is defect-free.

    Brightroom 24 Pocket Mesh Shoe Organizer
    Brightroom 24 Pocket Mesh Shoe Organizer. Photo: target.com.

    Door and closet storage: two Brightroom shoe organizers plus an IKEA SKUBB option for folded clothes.

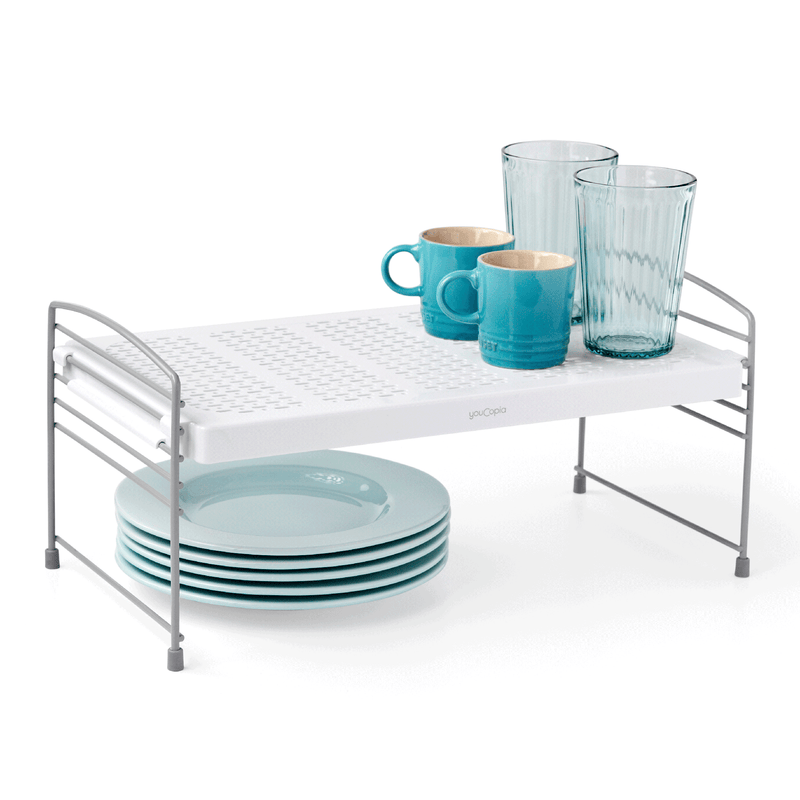
    YouCopia UpSpace 16-inch Adjustable Shelf
    YouCopia UpSpace 16-inch Adjustable Shelf. Photo: youcopia.com.

    Cabinet storage: an OXO turntable, YouCopia adjustable shelf and bakeware rack, and a narrow Brightroom bin.

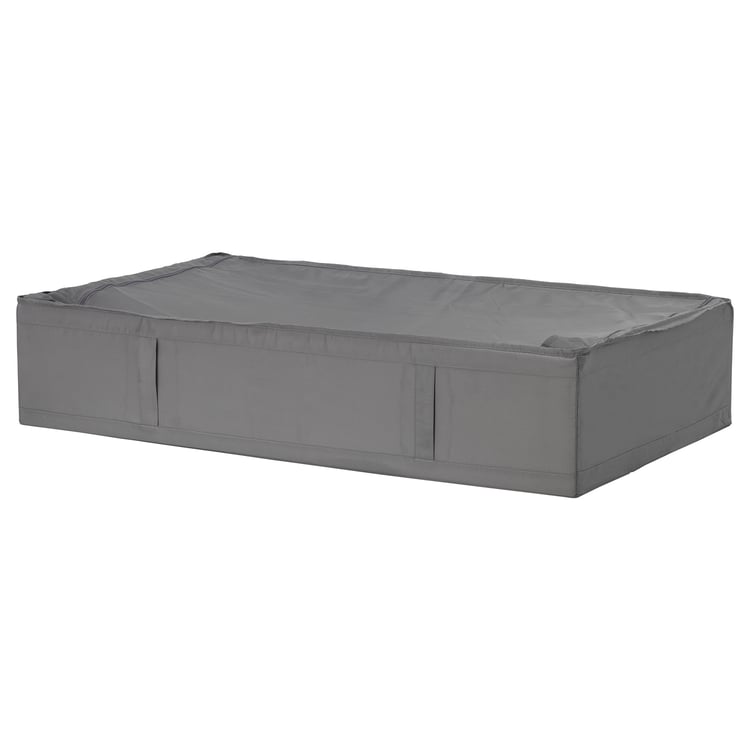
    IKEA SKUBB storage case dark gray 105.910.64
    IKEA SKUBB storage case dark gray 105.910.64. Photo: ikea.com.

    Under-bed storage: the IKEA SKUBB case with its handle warning, compared with a rigid Sterilite HingeLID box.

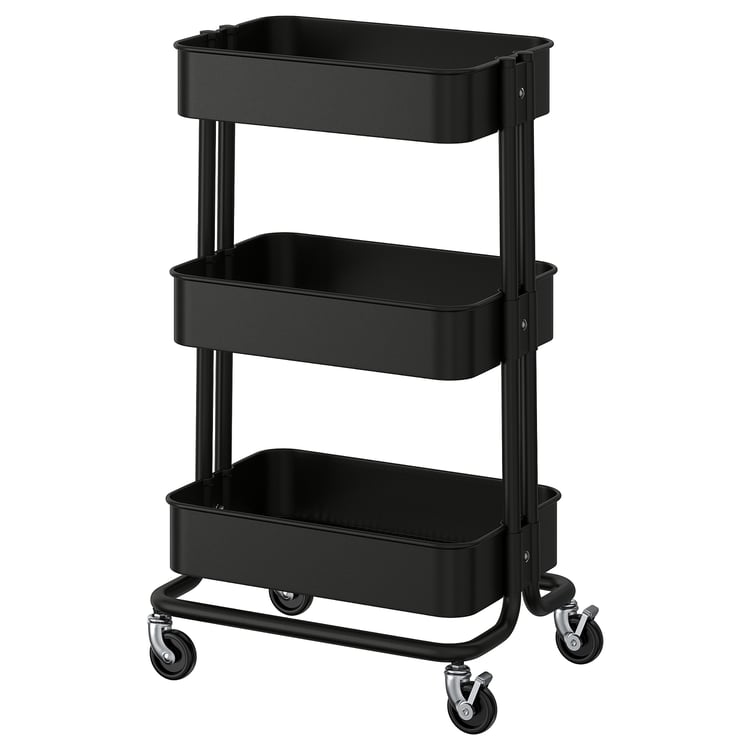
    IKEA RÅSKOG utility cart black 405.821.81
    IKEA RÅSKOG utility cart black 405.821.81. Photo: ikea.com.

    Narrow freestanding storage: IKEA RÅSKOG and Brightroom carts, plus IKEA VESKEN only where its required wall anchoring can be installed.

    Wall-fixing check: VESKEN is not a no-drill option. Follow its anchoring instructions and obtain any permission required by your lease. If that installation is unsuitable, choose another approach.

  • Rental Window Privacy and Light Control Without Permanent Changes

    Rental windows can bring in welcome daylight—and unwanted glare, streetlights, or views from nearby buildings. The right fix depends on what bothers you most, how the window opens, and what your lease allows. Measure first and choose a setup you can remove without damaging the frame or finish.

    Decide what you need to change

    Privacy, glare reduction, and room-darkening are different jobs. A light-filtering panel can soften daylight while still letting some light through. A blackout panel can make a bedroom darker, but may also reduce daytime light. A temporary film can obscure a view, but it can change the appearance of the glass and may not suit every window.

    Renter-friendly approaches

    • Tension-rod curtains: These can work inside a compatible window recess without drilling. Check the recess dimensions, rod diameter, and load guidance; avoid placing a heavy curtain where it could fall onto a child or pet.
    • Removable adhesive hooks: They can support lightweight panels on suitable surfaces. Follow the weight rating, surface-preparation steps, and removal instructions. Paint age and texture affect how adhesives release.
    • Freestanding or clamp-style shades: Some designs attach to the window frame without screws. Verify that the model matches the frame and does not interfere with tilt, locks, or emergency operation.
    • Temporary window film: Static-cling film may be removable on compatible smooth glass. Check whether the product is allowed, whether it affects the view or window function, and whether it is suitable for the glass type.
    • Layered curtains: A sheer layer can provide daytime screening while a heavier panel offers more privacy or darkness at night. Confirm that the mounting method is stable and the fabric does not cover a heater or obstruct a window used for escape.

    Measure before you buy

    Measure the inside width and height of the recess, then note handles, locks, trim, and any window that opens inward. For curtains, decide whether you want coverage inside the frame or beyond it. A product that is slightly too wide may block a handle; one that is too short may leave a light gap.

    Protect the rental

    Read the lease and ask before applying film or hardware if the rules are unclear. Test removable adhesive in a hidden spot when the manufacturer allows it, and remove it as directed rather than pulling sharply. Keep the original blinds and hardware so they can be reinstalled later.

    Choose by priority

    For privacy with daylight, begin with a light-filtering treatment. For a bedroom affected by early light, consider a properly fitted room-darkening panel. For a street-level window, check sightlines from outside at both day and night before deciding whether a sheer layer is enough.

    The best solution is the one that fits the window, meets your lease requirements, and can be removed without damage. Measure carefully, check how the window operates, and keep every exit clear.

    Ready to compare specific mounts? See our NoNo vs. Umbra Anywhere comparison for two researched options, owner feedback and the fit and load checks that determine whether either works in your rental.

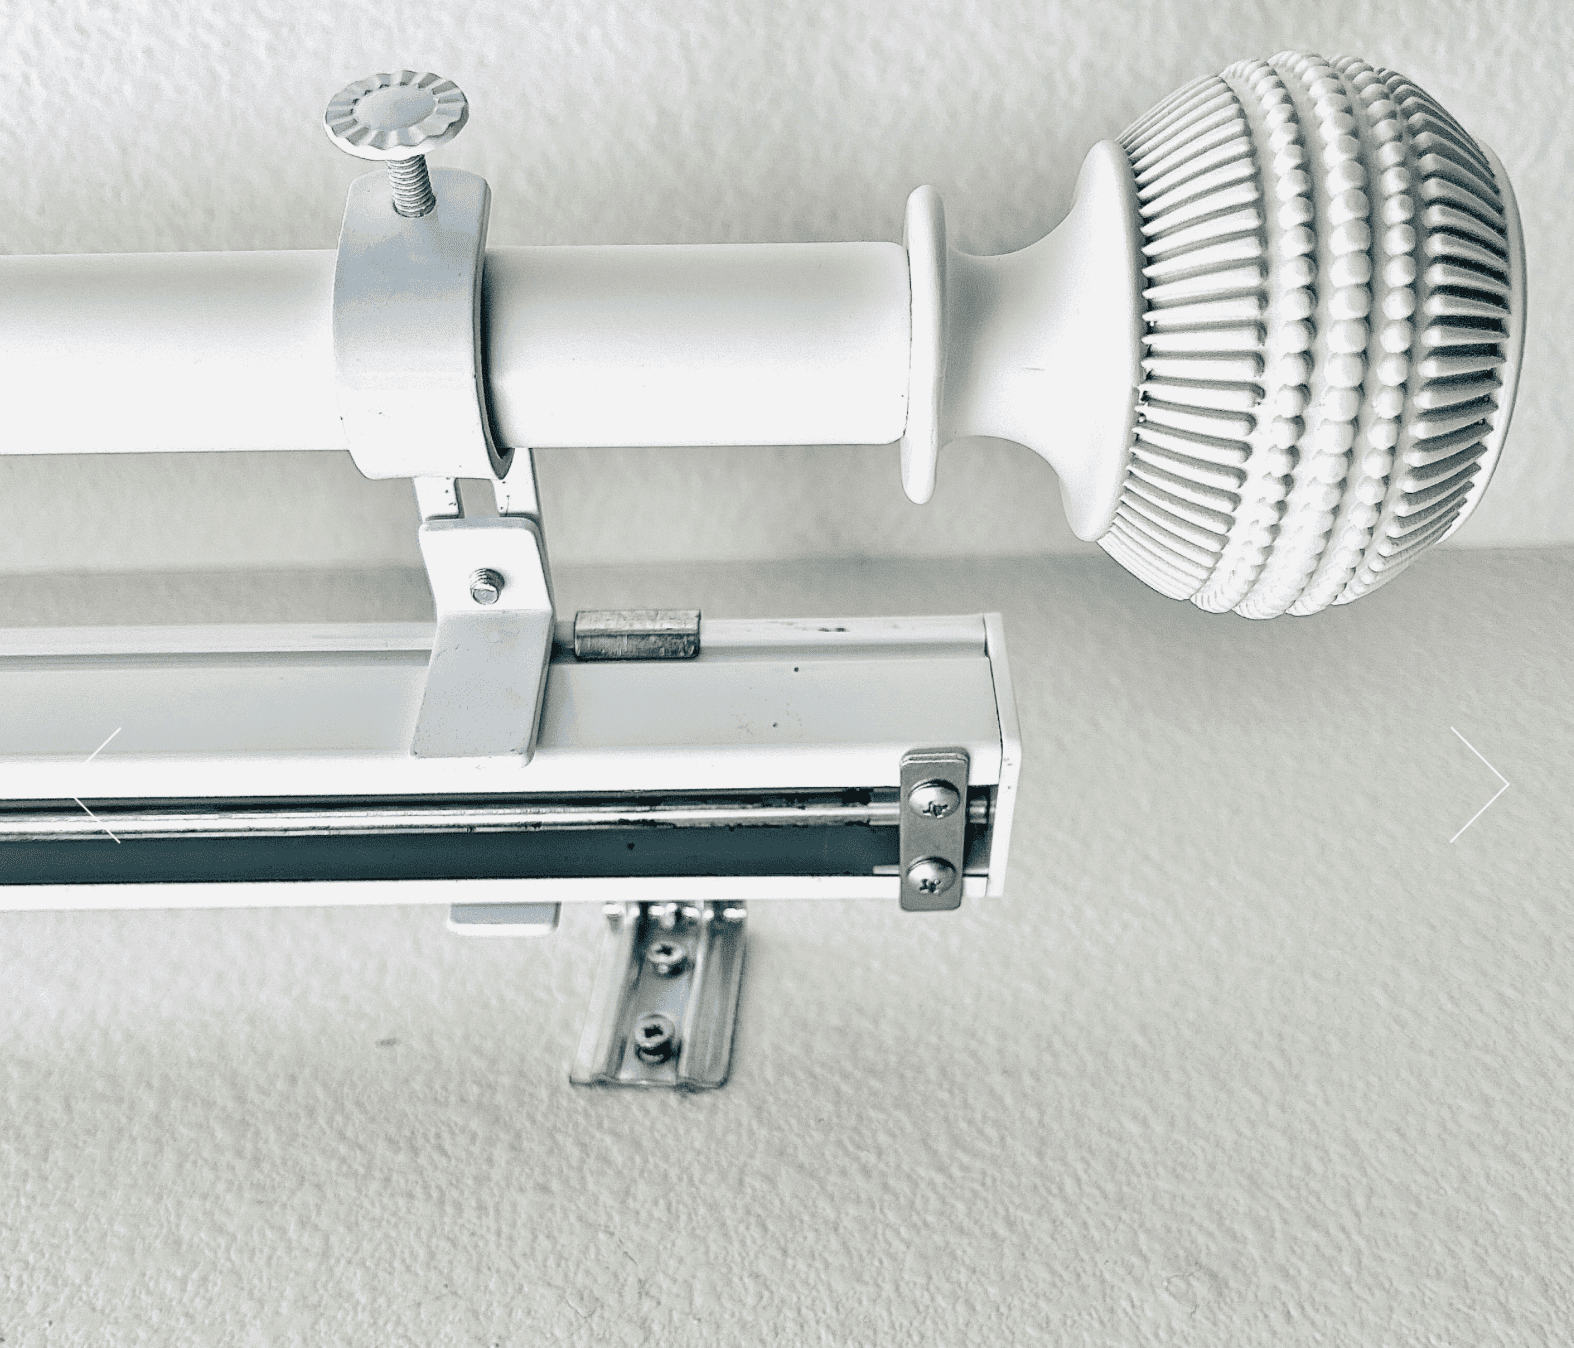
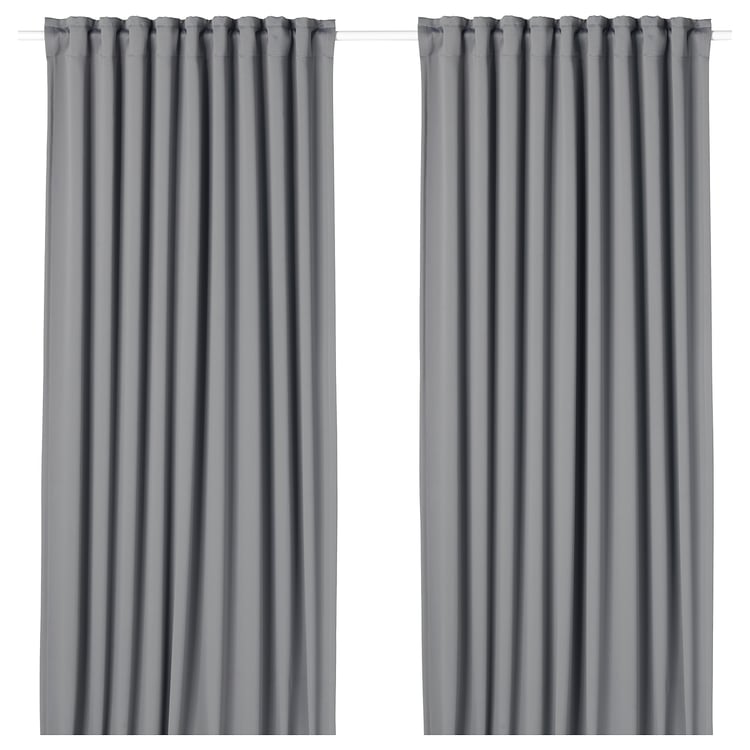
    Fabric and mounting hardware are separate choices. These photos show examples from our curtain comparison, not tested bundles. Confirm the complete hanging weight, mounting fit, window operation and return terms before combining them.

  • No-Drill Apartment Security: Practical Upgrades for Renters

    When you rent, improving security means working within the door, windows, lease, and building rules you already have. Start with simple, reversible steps, and treat add-on devices as supplements—not substitutes for working locks, safe building practices, or emergency planning.

    Start with the basics

    Check that the entry door closes and latches smoothly, the deadbolt works, and the strike plate is firmly attached. If anything is loose, damaged, or difficult to lock, report it to the landlord or property manager in writing. Keep a dated photo of the issue and the request.

    Before adding a device, read your lease and ask for written permission when an installation changes hardware, attaches to a shared surface, or affects the exterior of the building. Avoid changing locks or making permanent alterations without approval.

    Reversible options to consider

    • Door and window sensors: Battery-powered contact sensors can alert you when an opening is disturbed. Check that the adhesive is appropriate for the surface and removable, and test it before relying on it.
    • Portable door alarms: Some devices sound locally when a door is opened. Confirm that the model fits your door and does not block a required exit or interfere with other residents.
    • Motion-activated indoor lighting: A plug-in or battery light can help illuminate a dark entry or hallway inside your unit. Keep cords out of walking paths.
    • Indoor cameras: Place cameras only inside your private space and aim them so they do not record neighbors, shared hallways, or private areas. Review the device’s storage, account-security, and notification settings.
    • Window locks and alarms: Ask the property manager to repair a damaged lock. Add-on alarms may provide a notification, but they do not make a weak window secure.

    What to skip or verify first

    Be cautious with adhesive locks, wedges, or braces that could delay a quick exit. Never block a door, window, or required fire escape. Do not assume that a product marketed as “no damage” will release cleanly from every paint, trim, or glass surface; follow the maker’s instructions and test in an inconspicuous spot when appropriate.

    A simple renter’s checklist

    1. Check your lease and building rules.
    2. Ask the landlord to fix any existing lock or door problem.
    3. Choose a device that fits your actual door or window.
    4. Keep exits clear and preserve access for emergencies.
    5. Secure device accounts with unique passwords and available two-factor authentication.
    6. Remove temporary products carefully at move-out and keep original hardware.

    The takeaway

    The most useful renter-friendly security setup is the one that fits the unit, follows the lease, protects privacy, and does not interfere with emergency egress. If a door or window does not lock properly, report the defect rather than relying on a gadget to compensate for it.

    Compare No-Drill Door Devices

    Before buying a portable lock or brace, compare the fit and installation limits of Addalock, DoorJammer, and SABRE’s adjustable bar. Our research-based comparison explains door direction, floor clearance, removal, and manufacturer instructions.